|
|
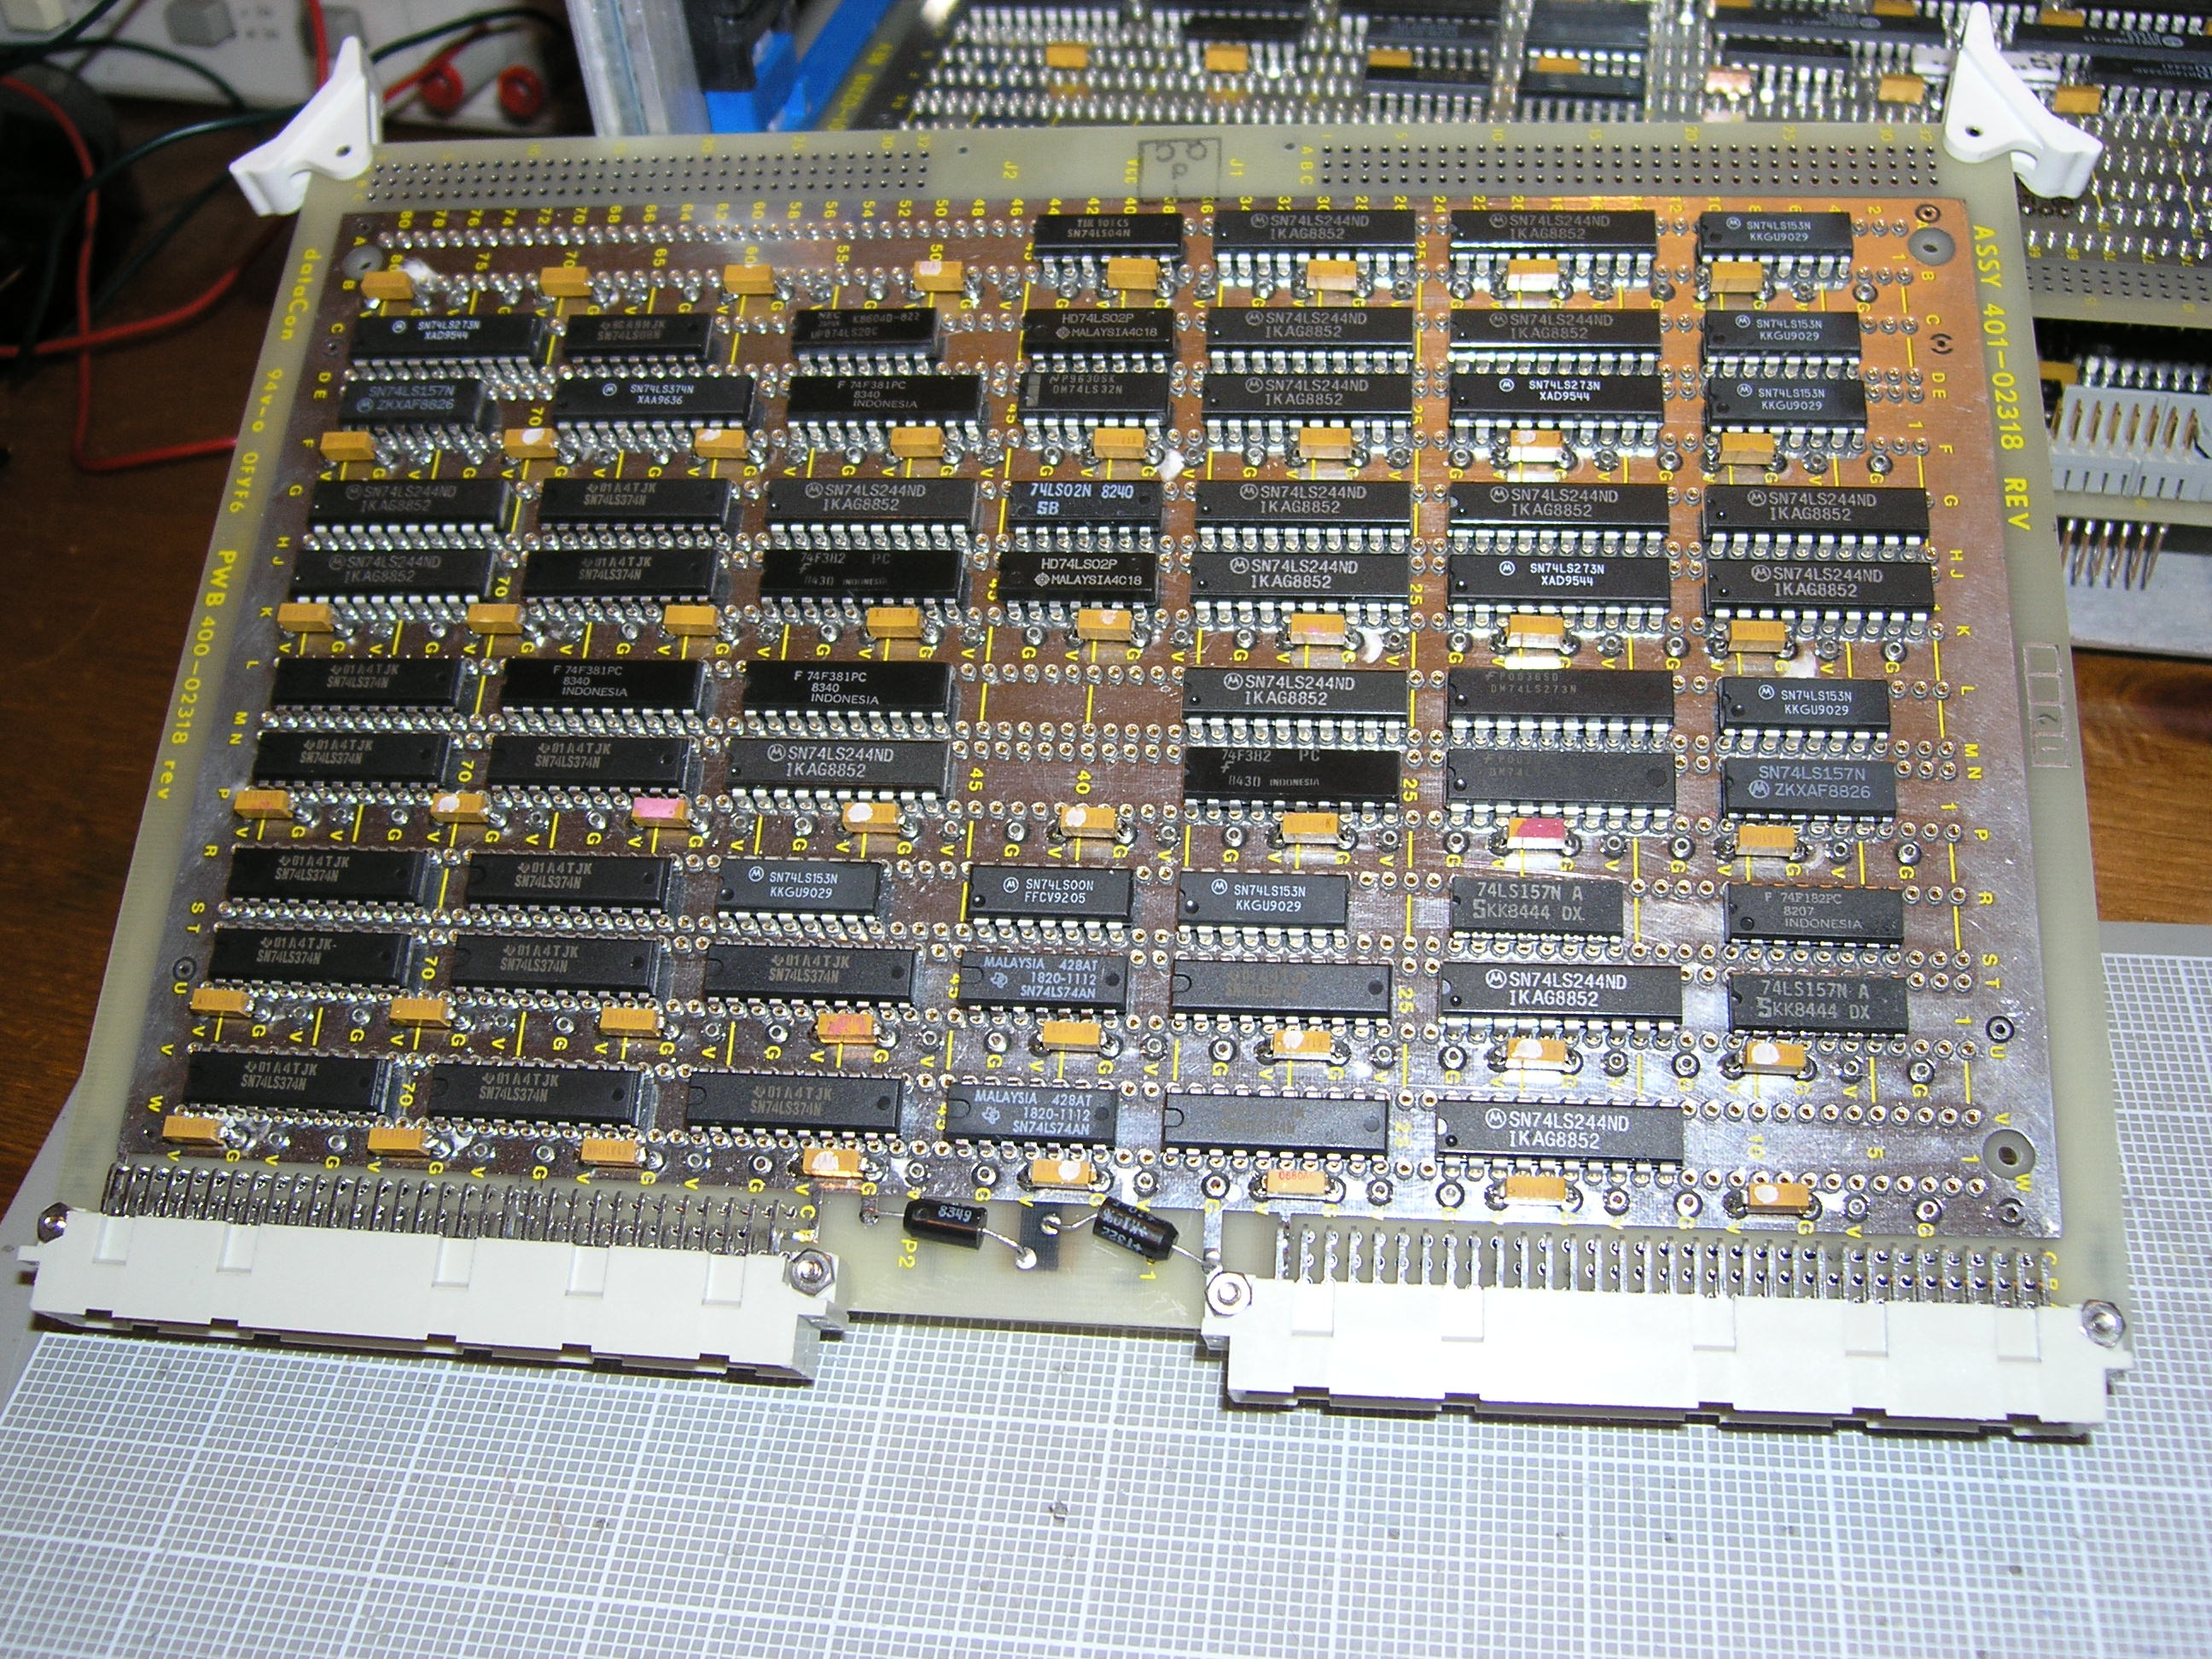
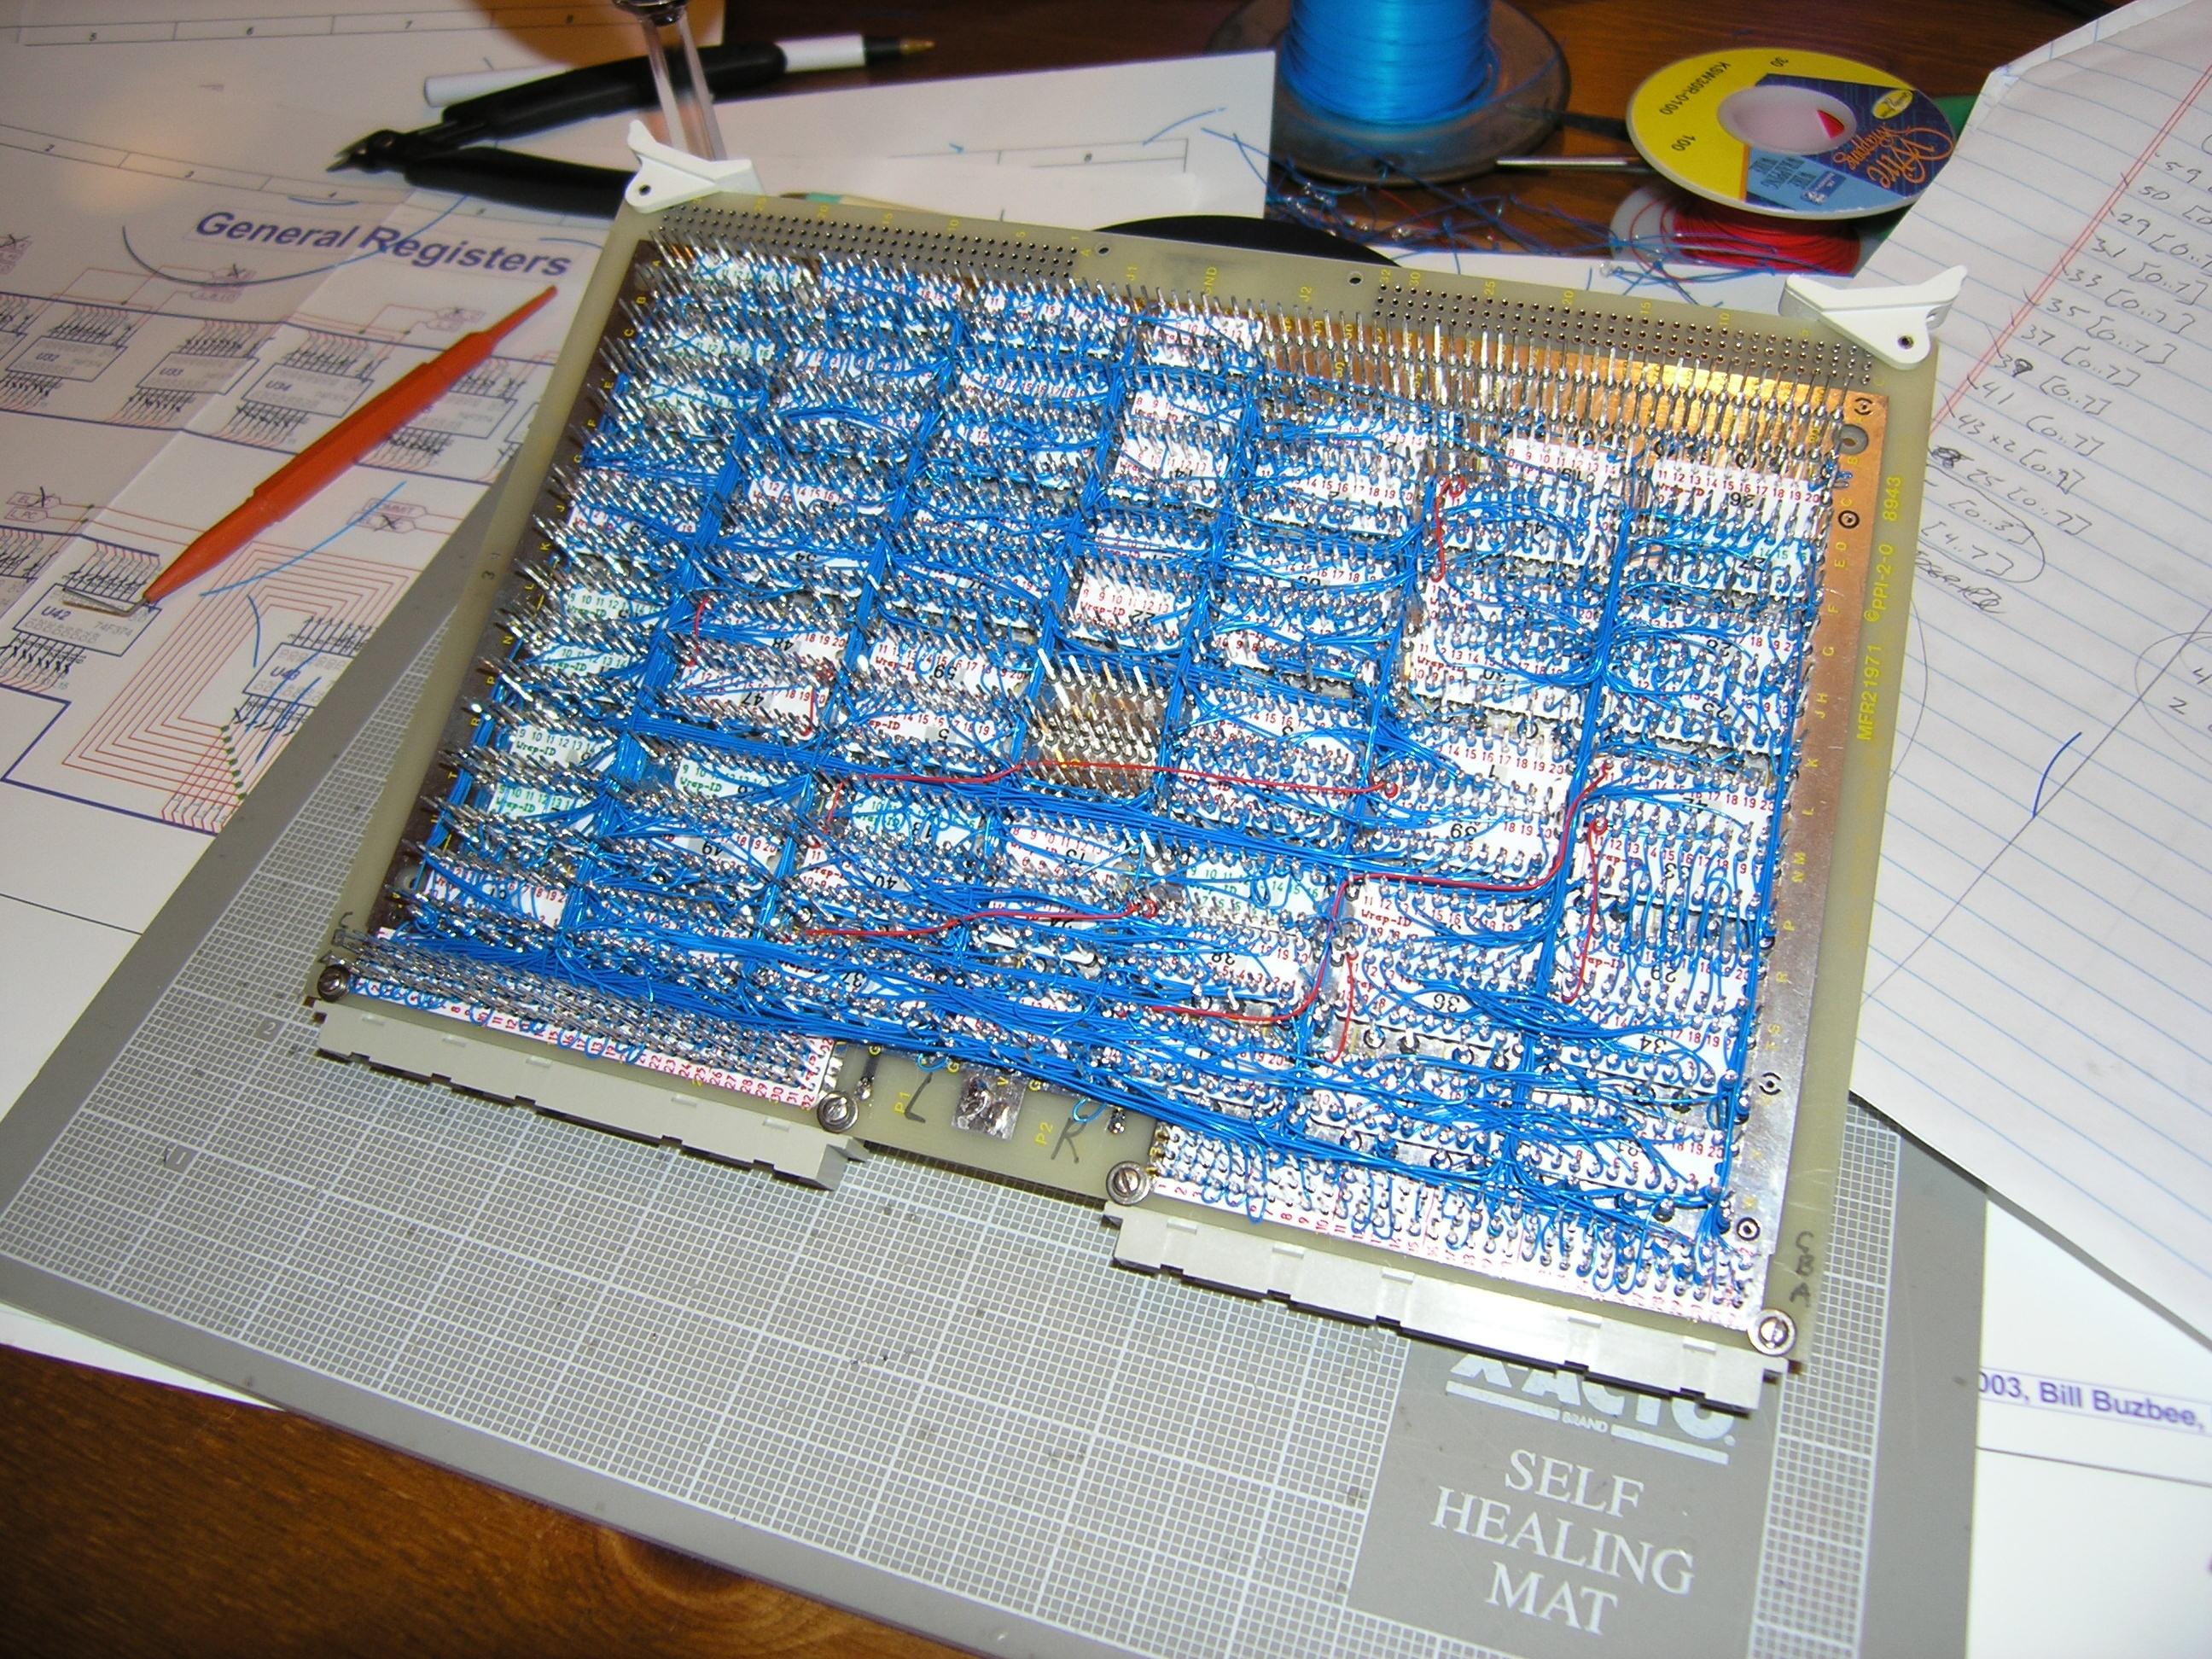
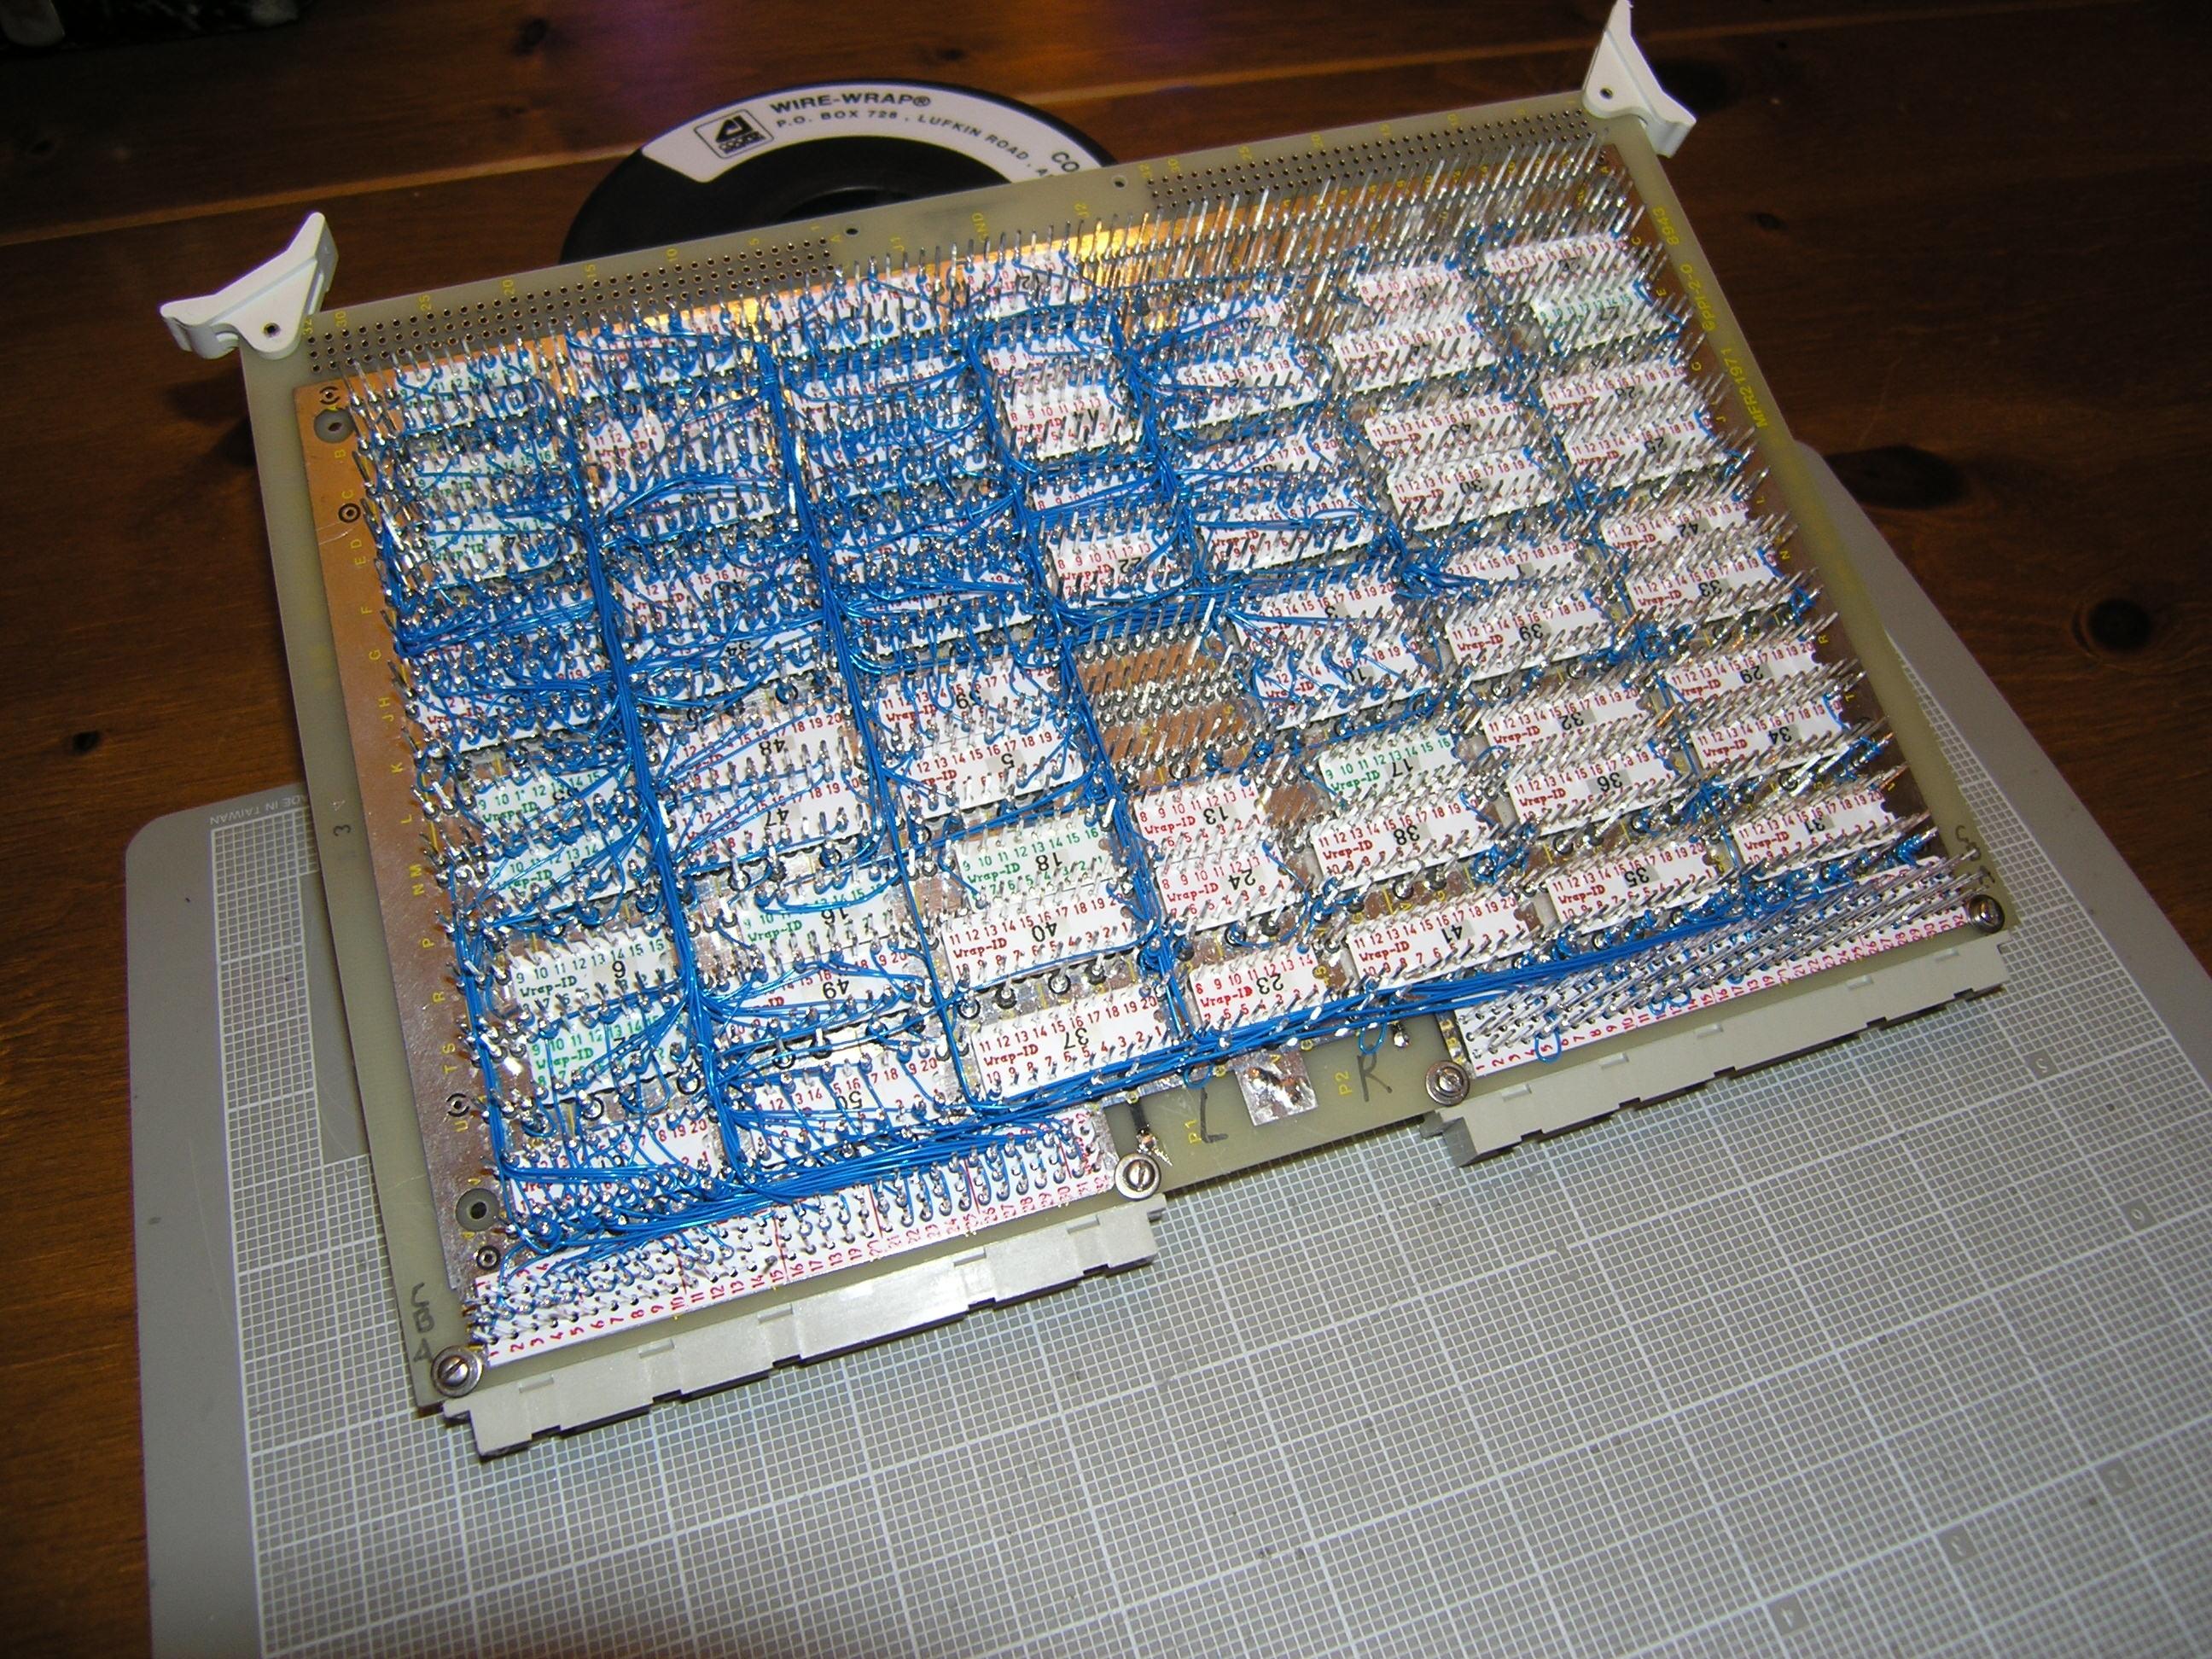
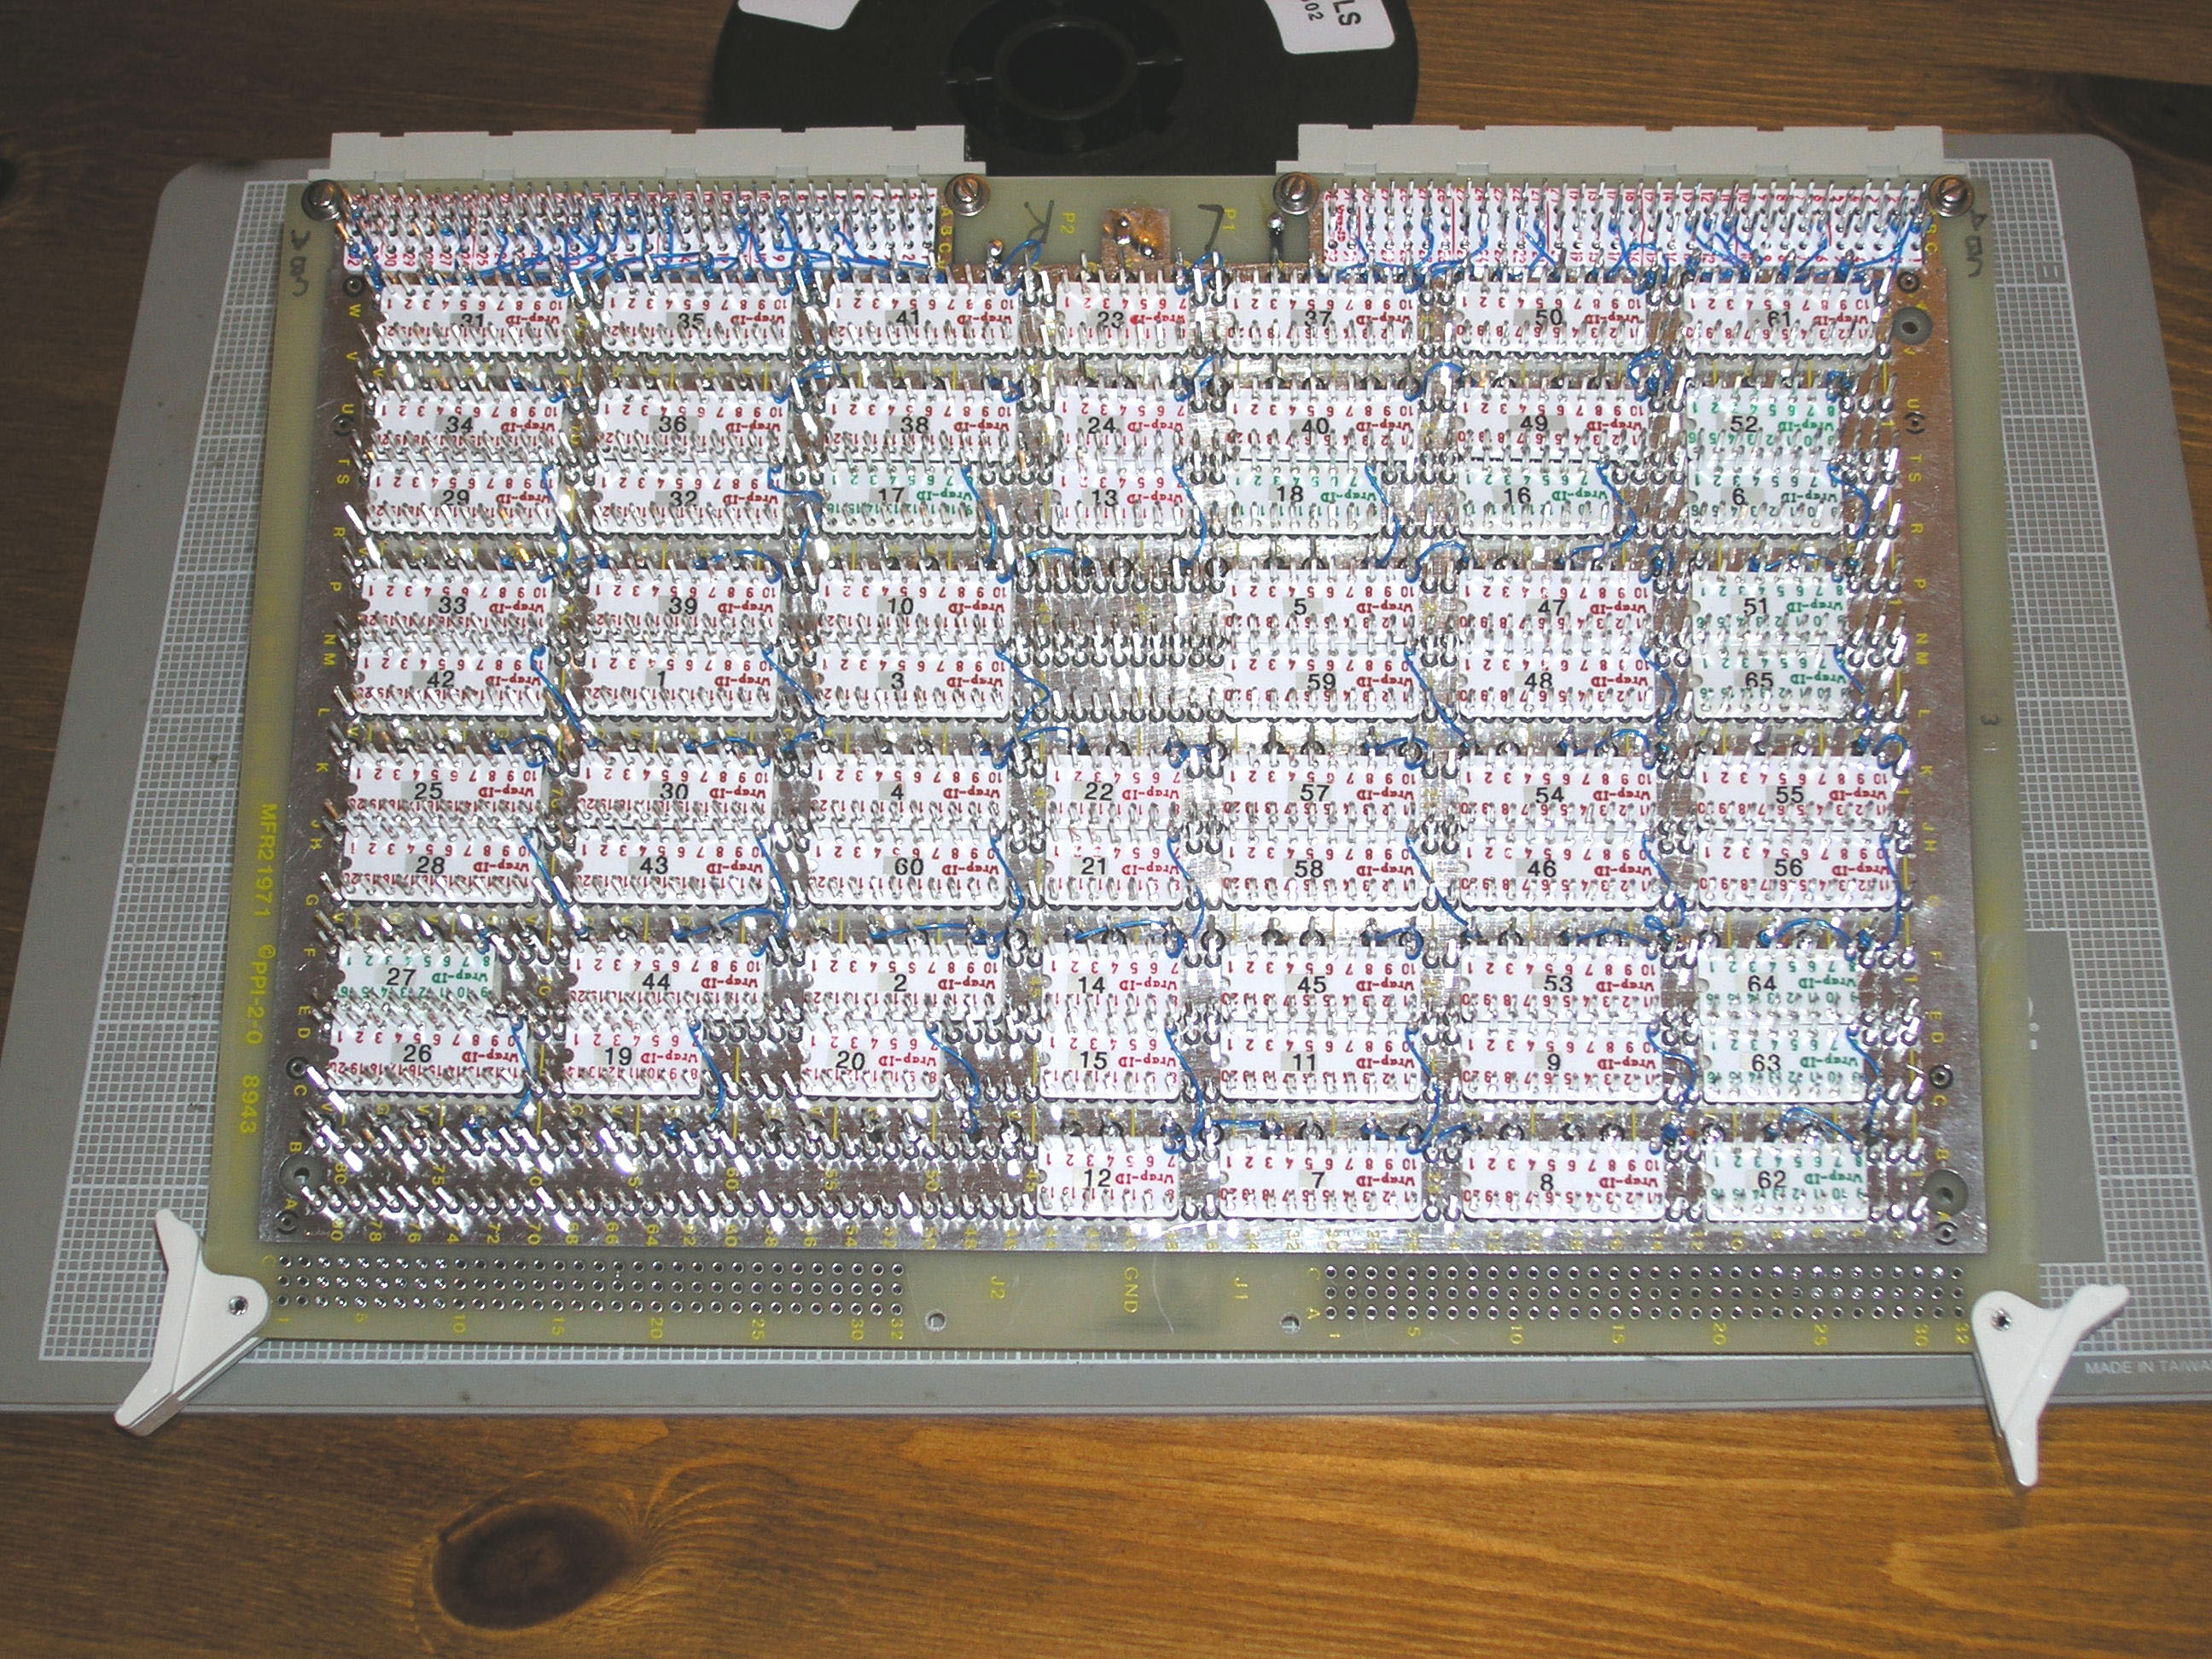
ALU/Register card construction [finished 4/12/2004]Before starting on the control card, I thought that it would be the most difficult to build. I think I was wrong. The ALU/Register card is going to be tough. It has the most devices than any other card, and almost all of the signals are bussed. This means that most pins will have two wraps on them. Wrapping the 2nd wire on a pin is significantly more error prone for me than doing the first one. 4/12/2004This was the toughest of the cards to build - but it's finally finished. Here's a shot of the populated component side:
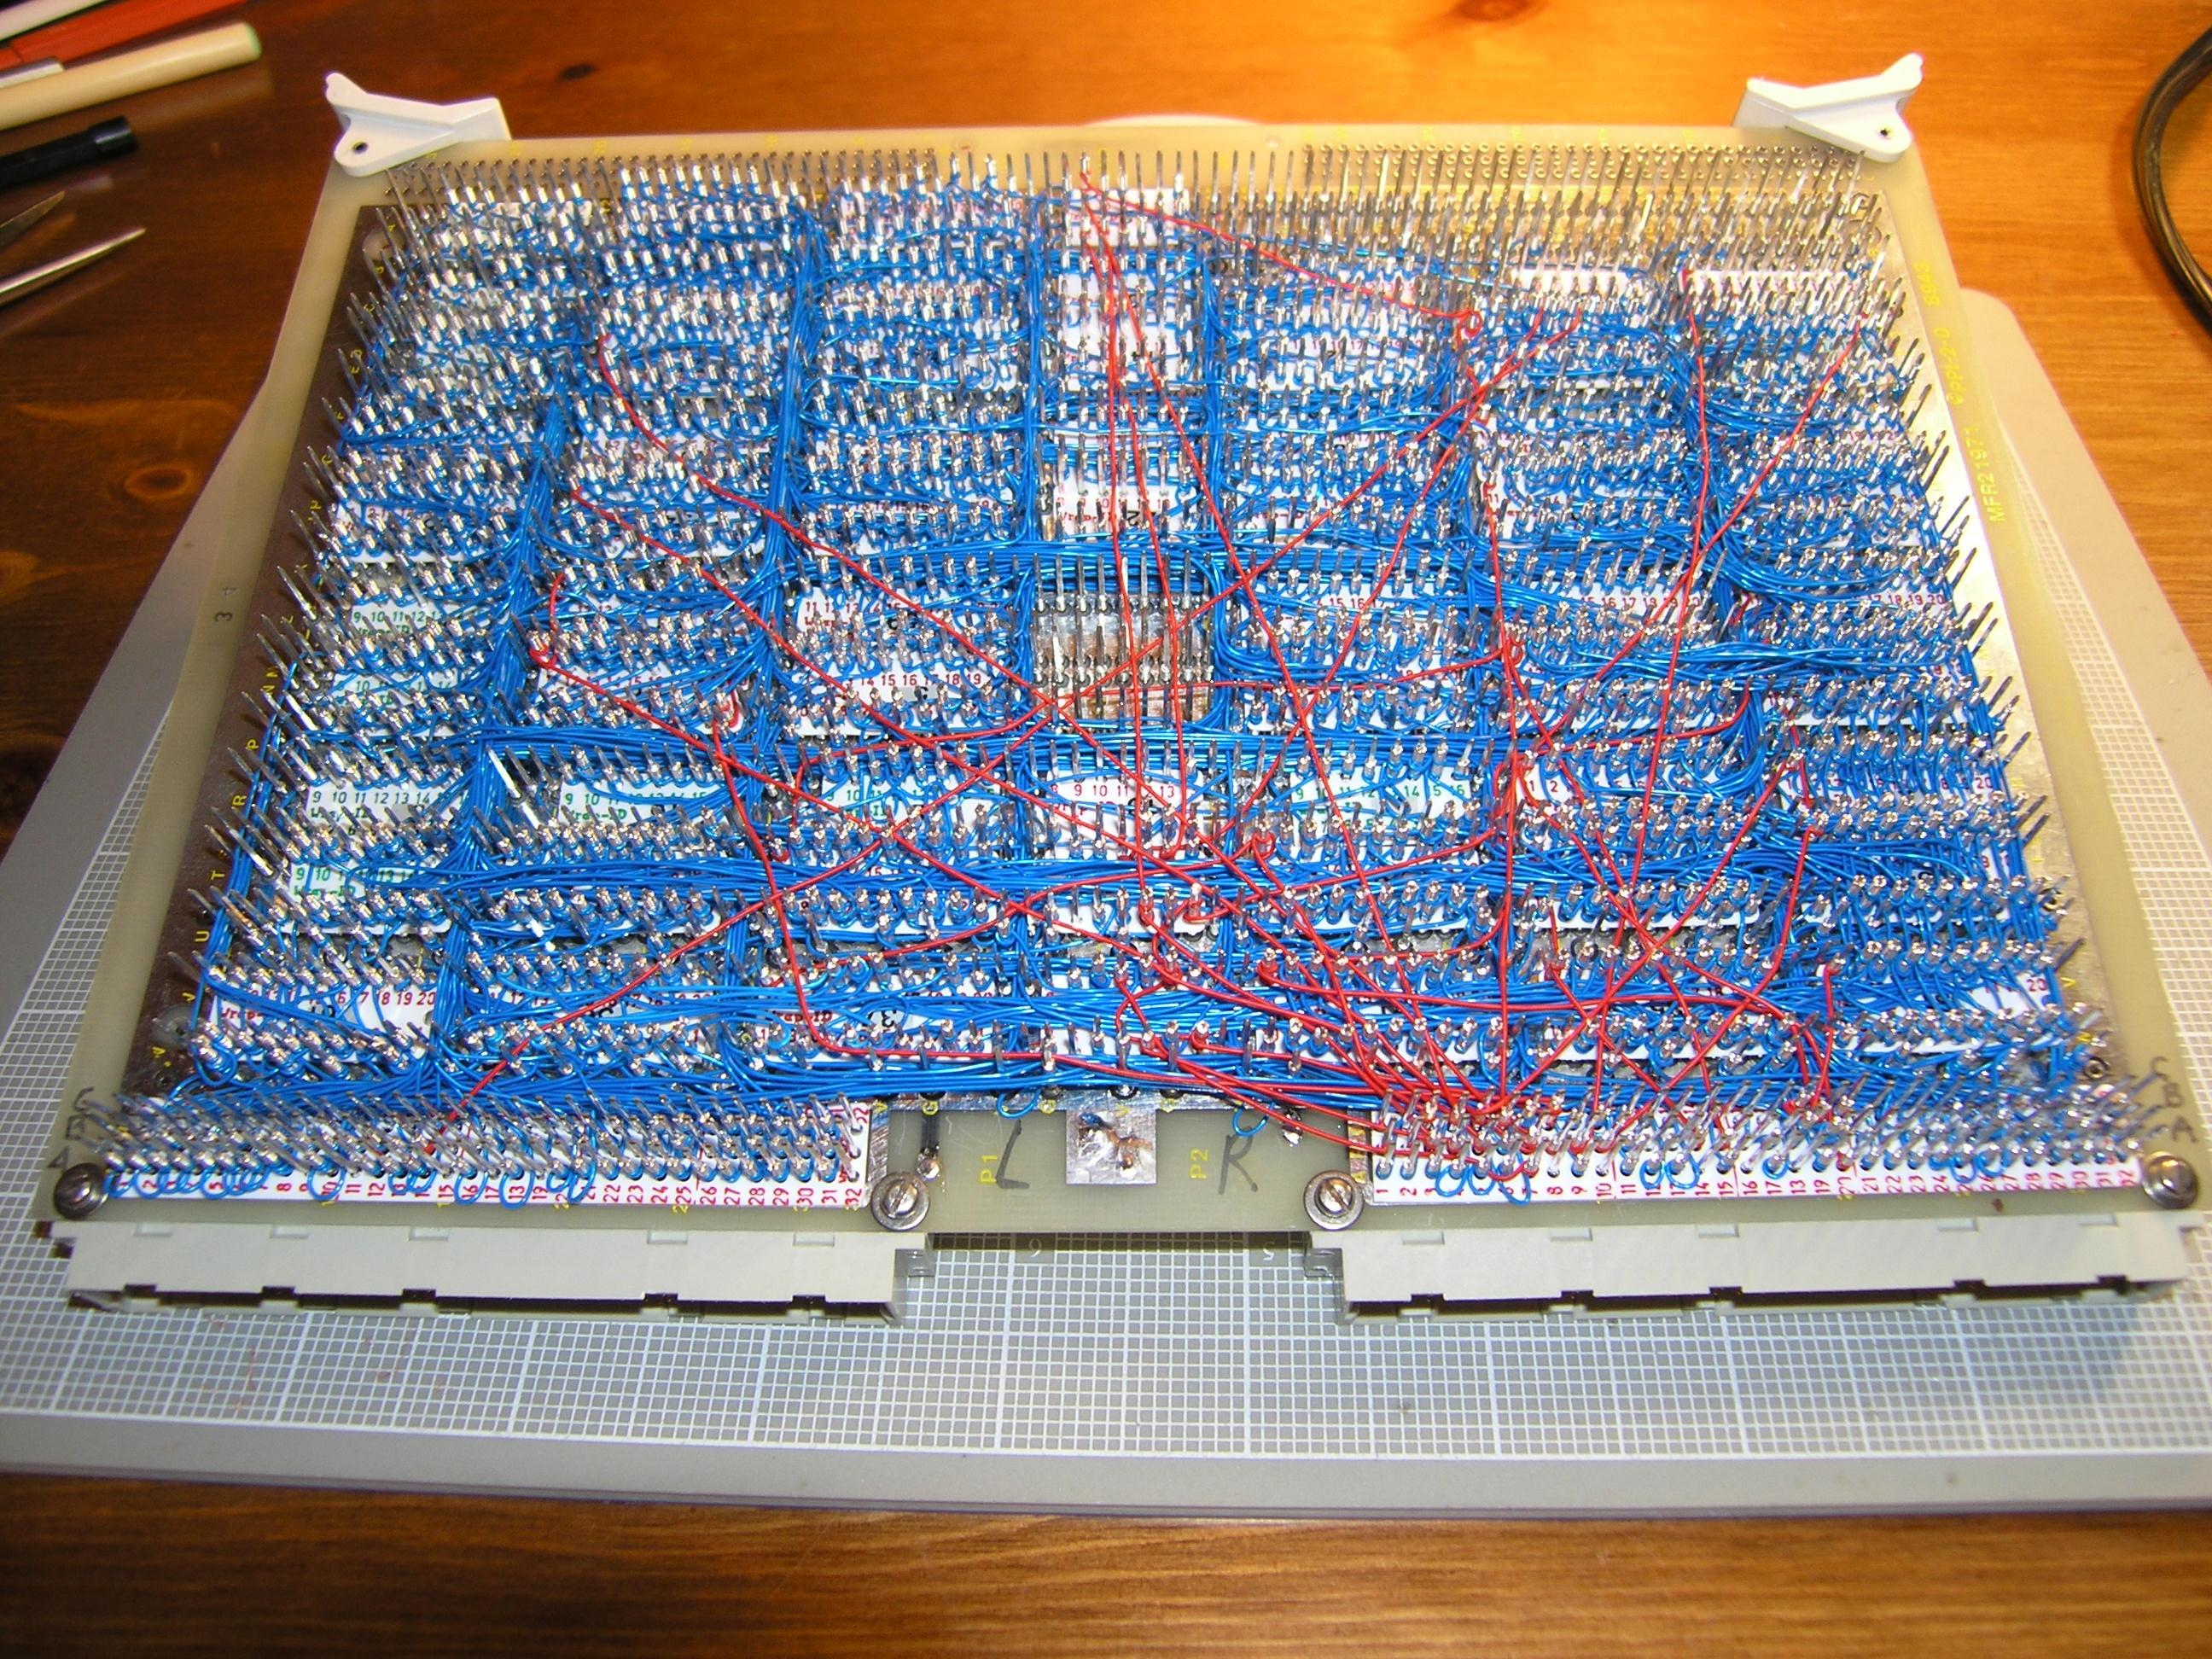
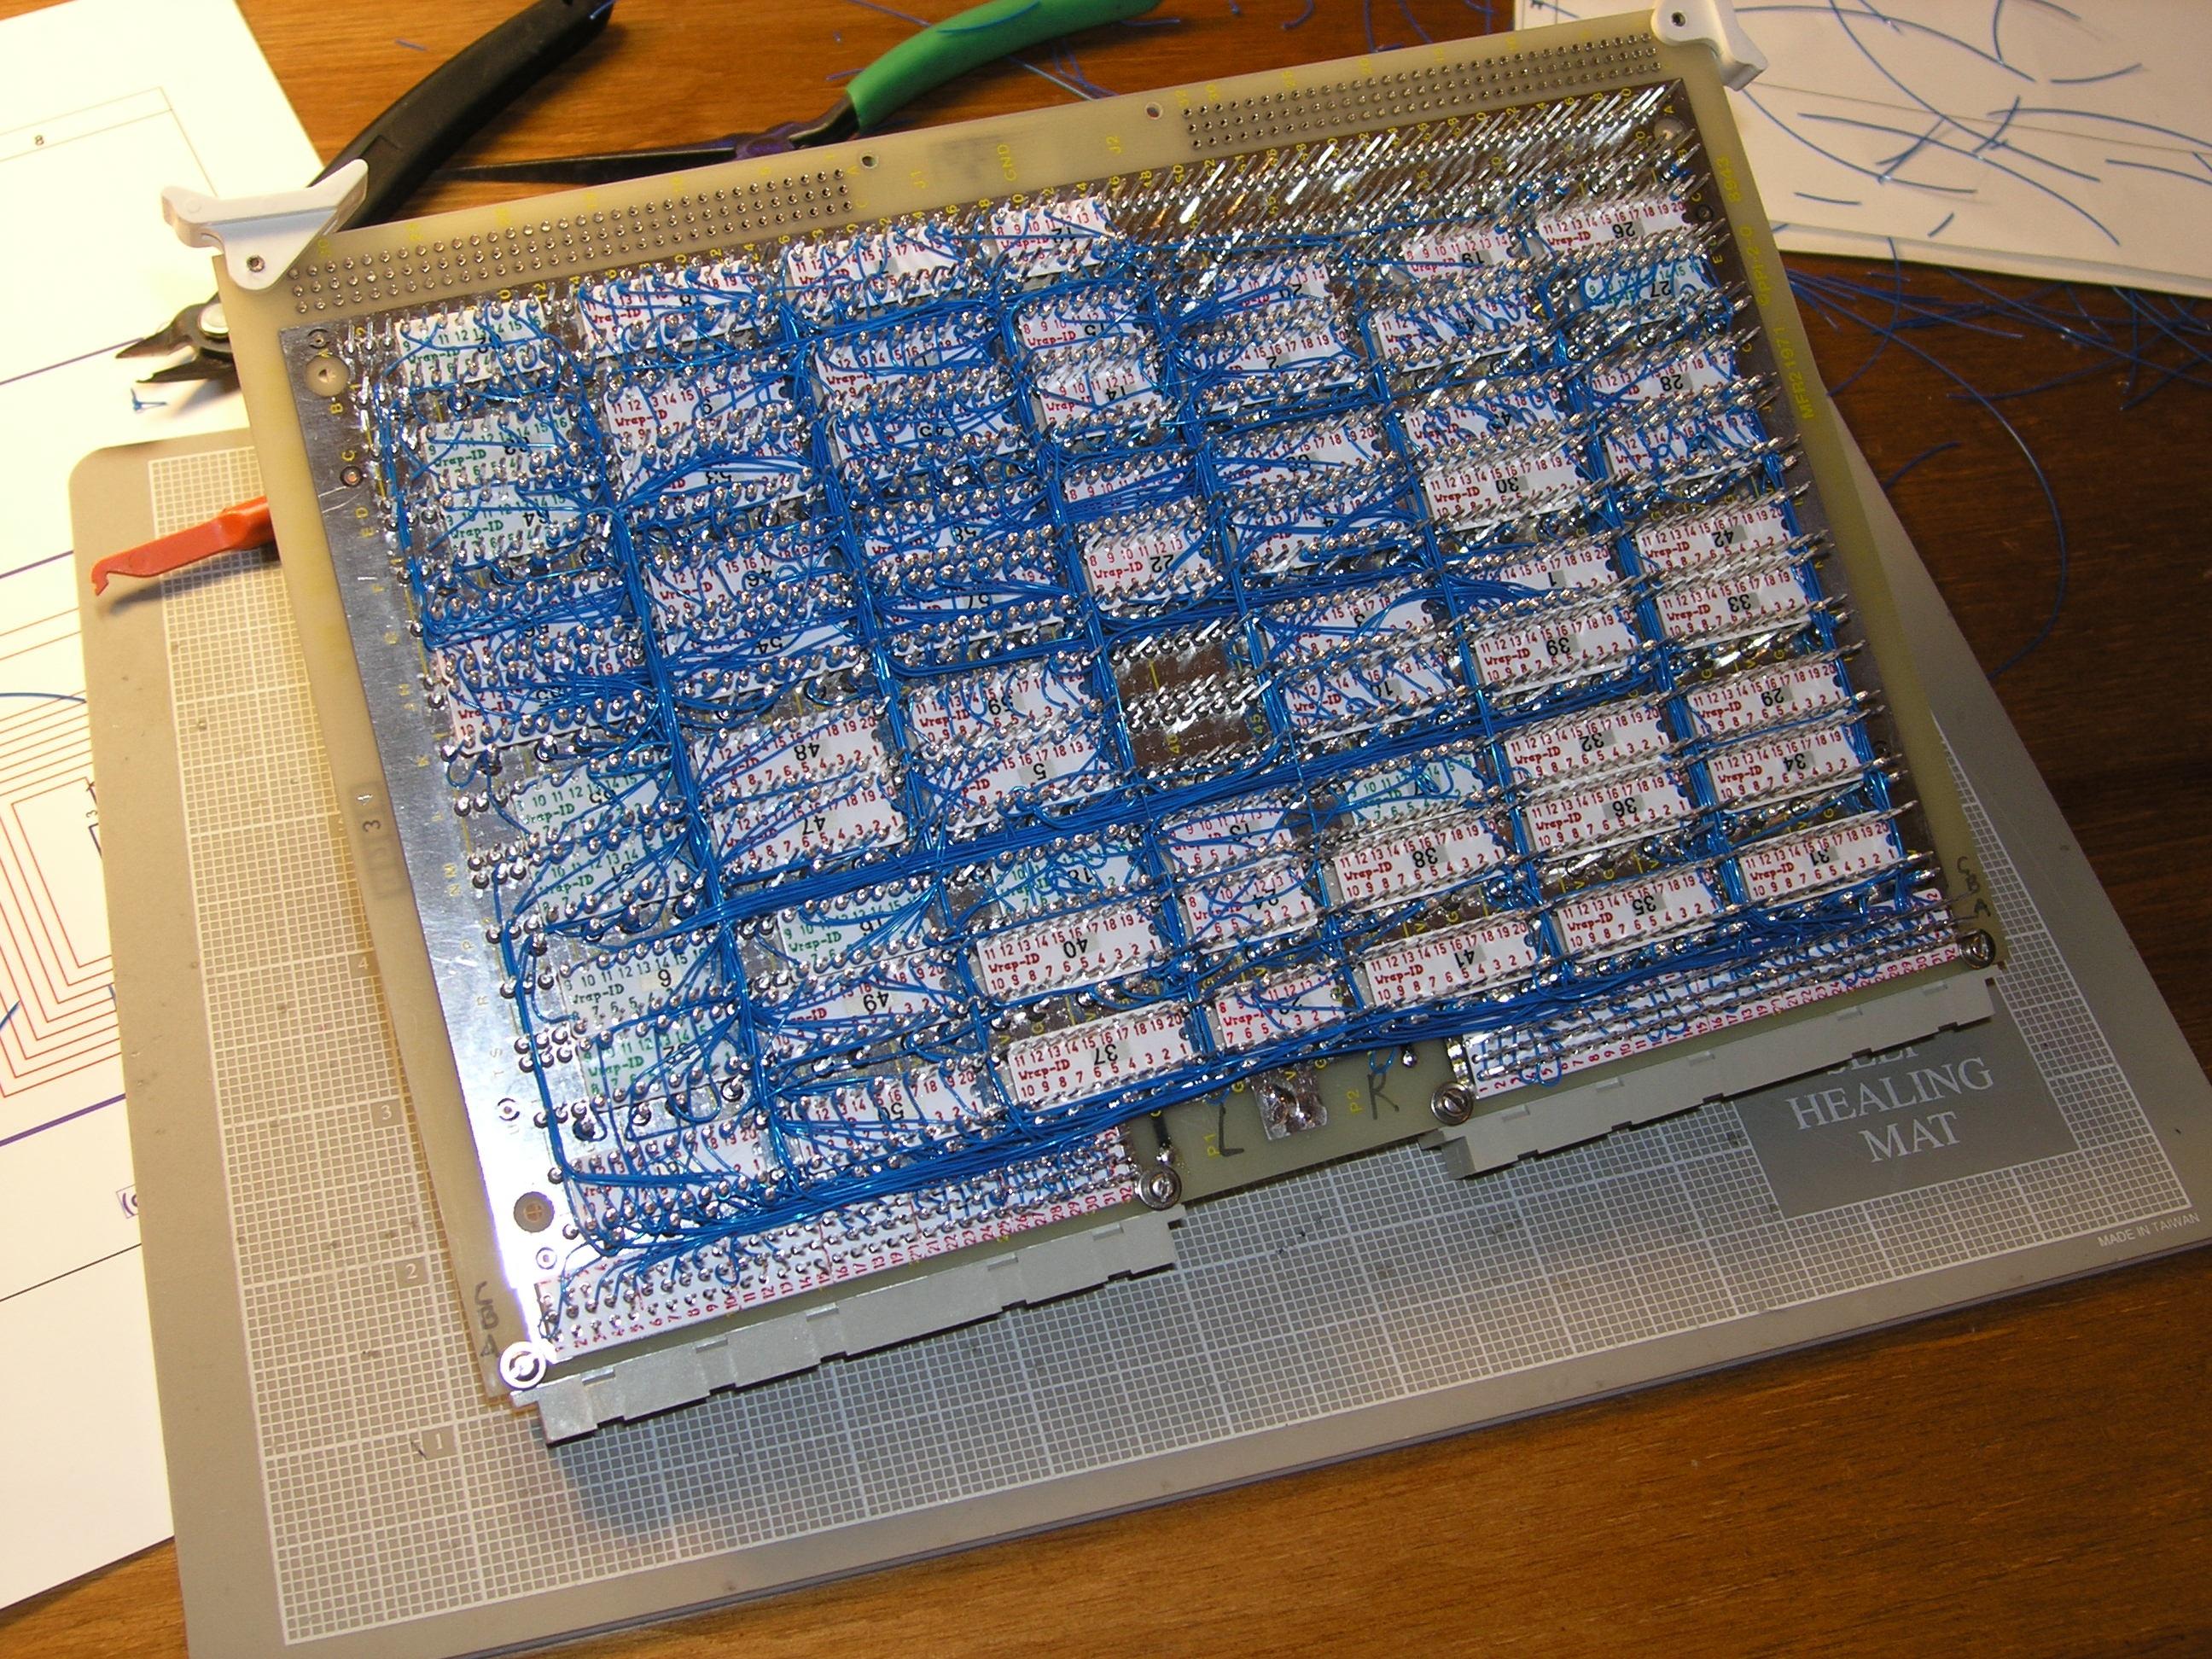
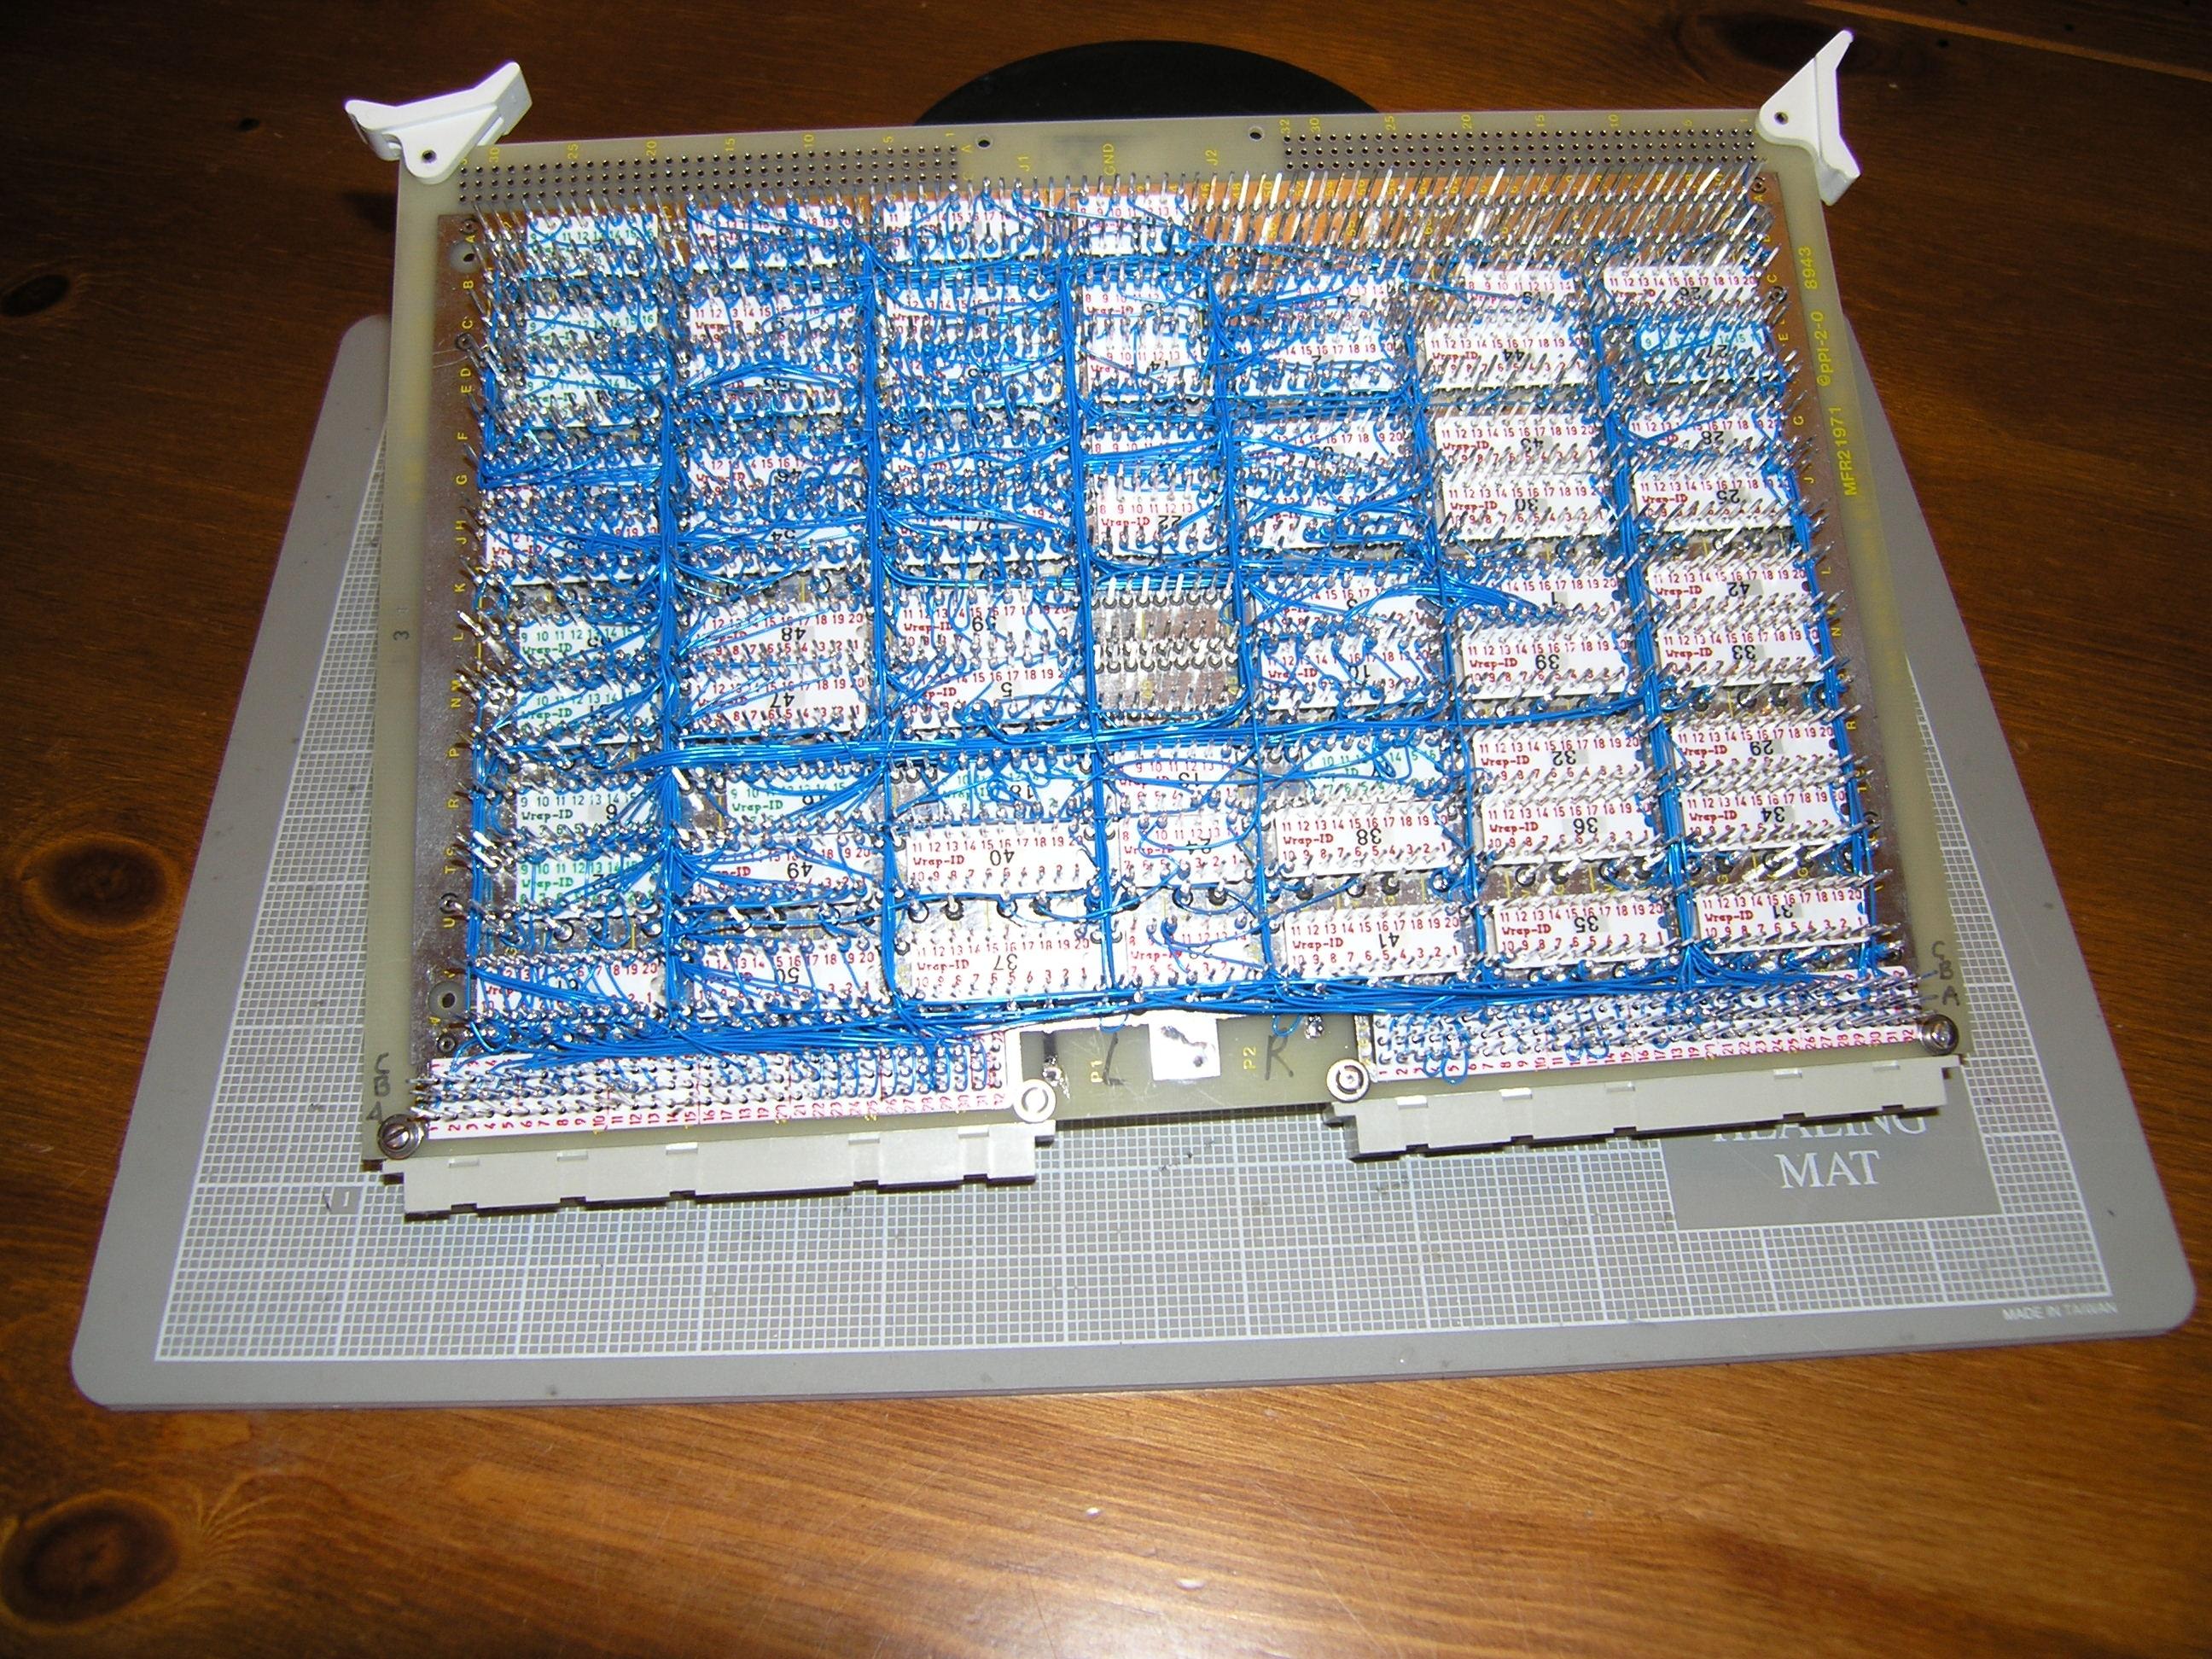
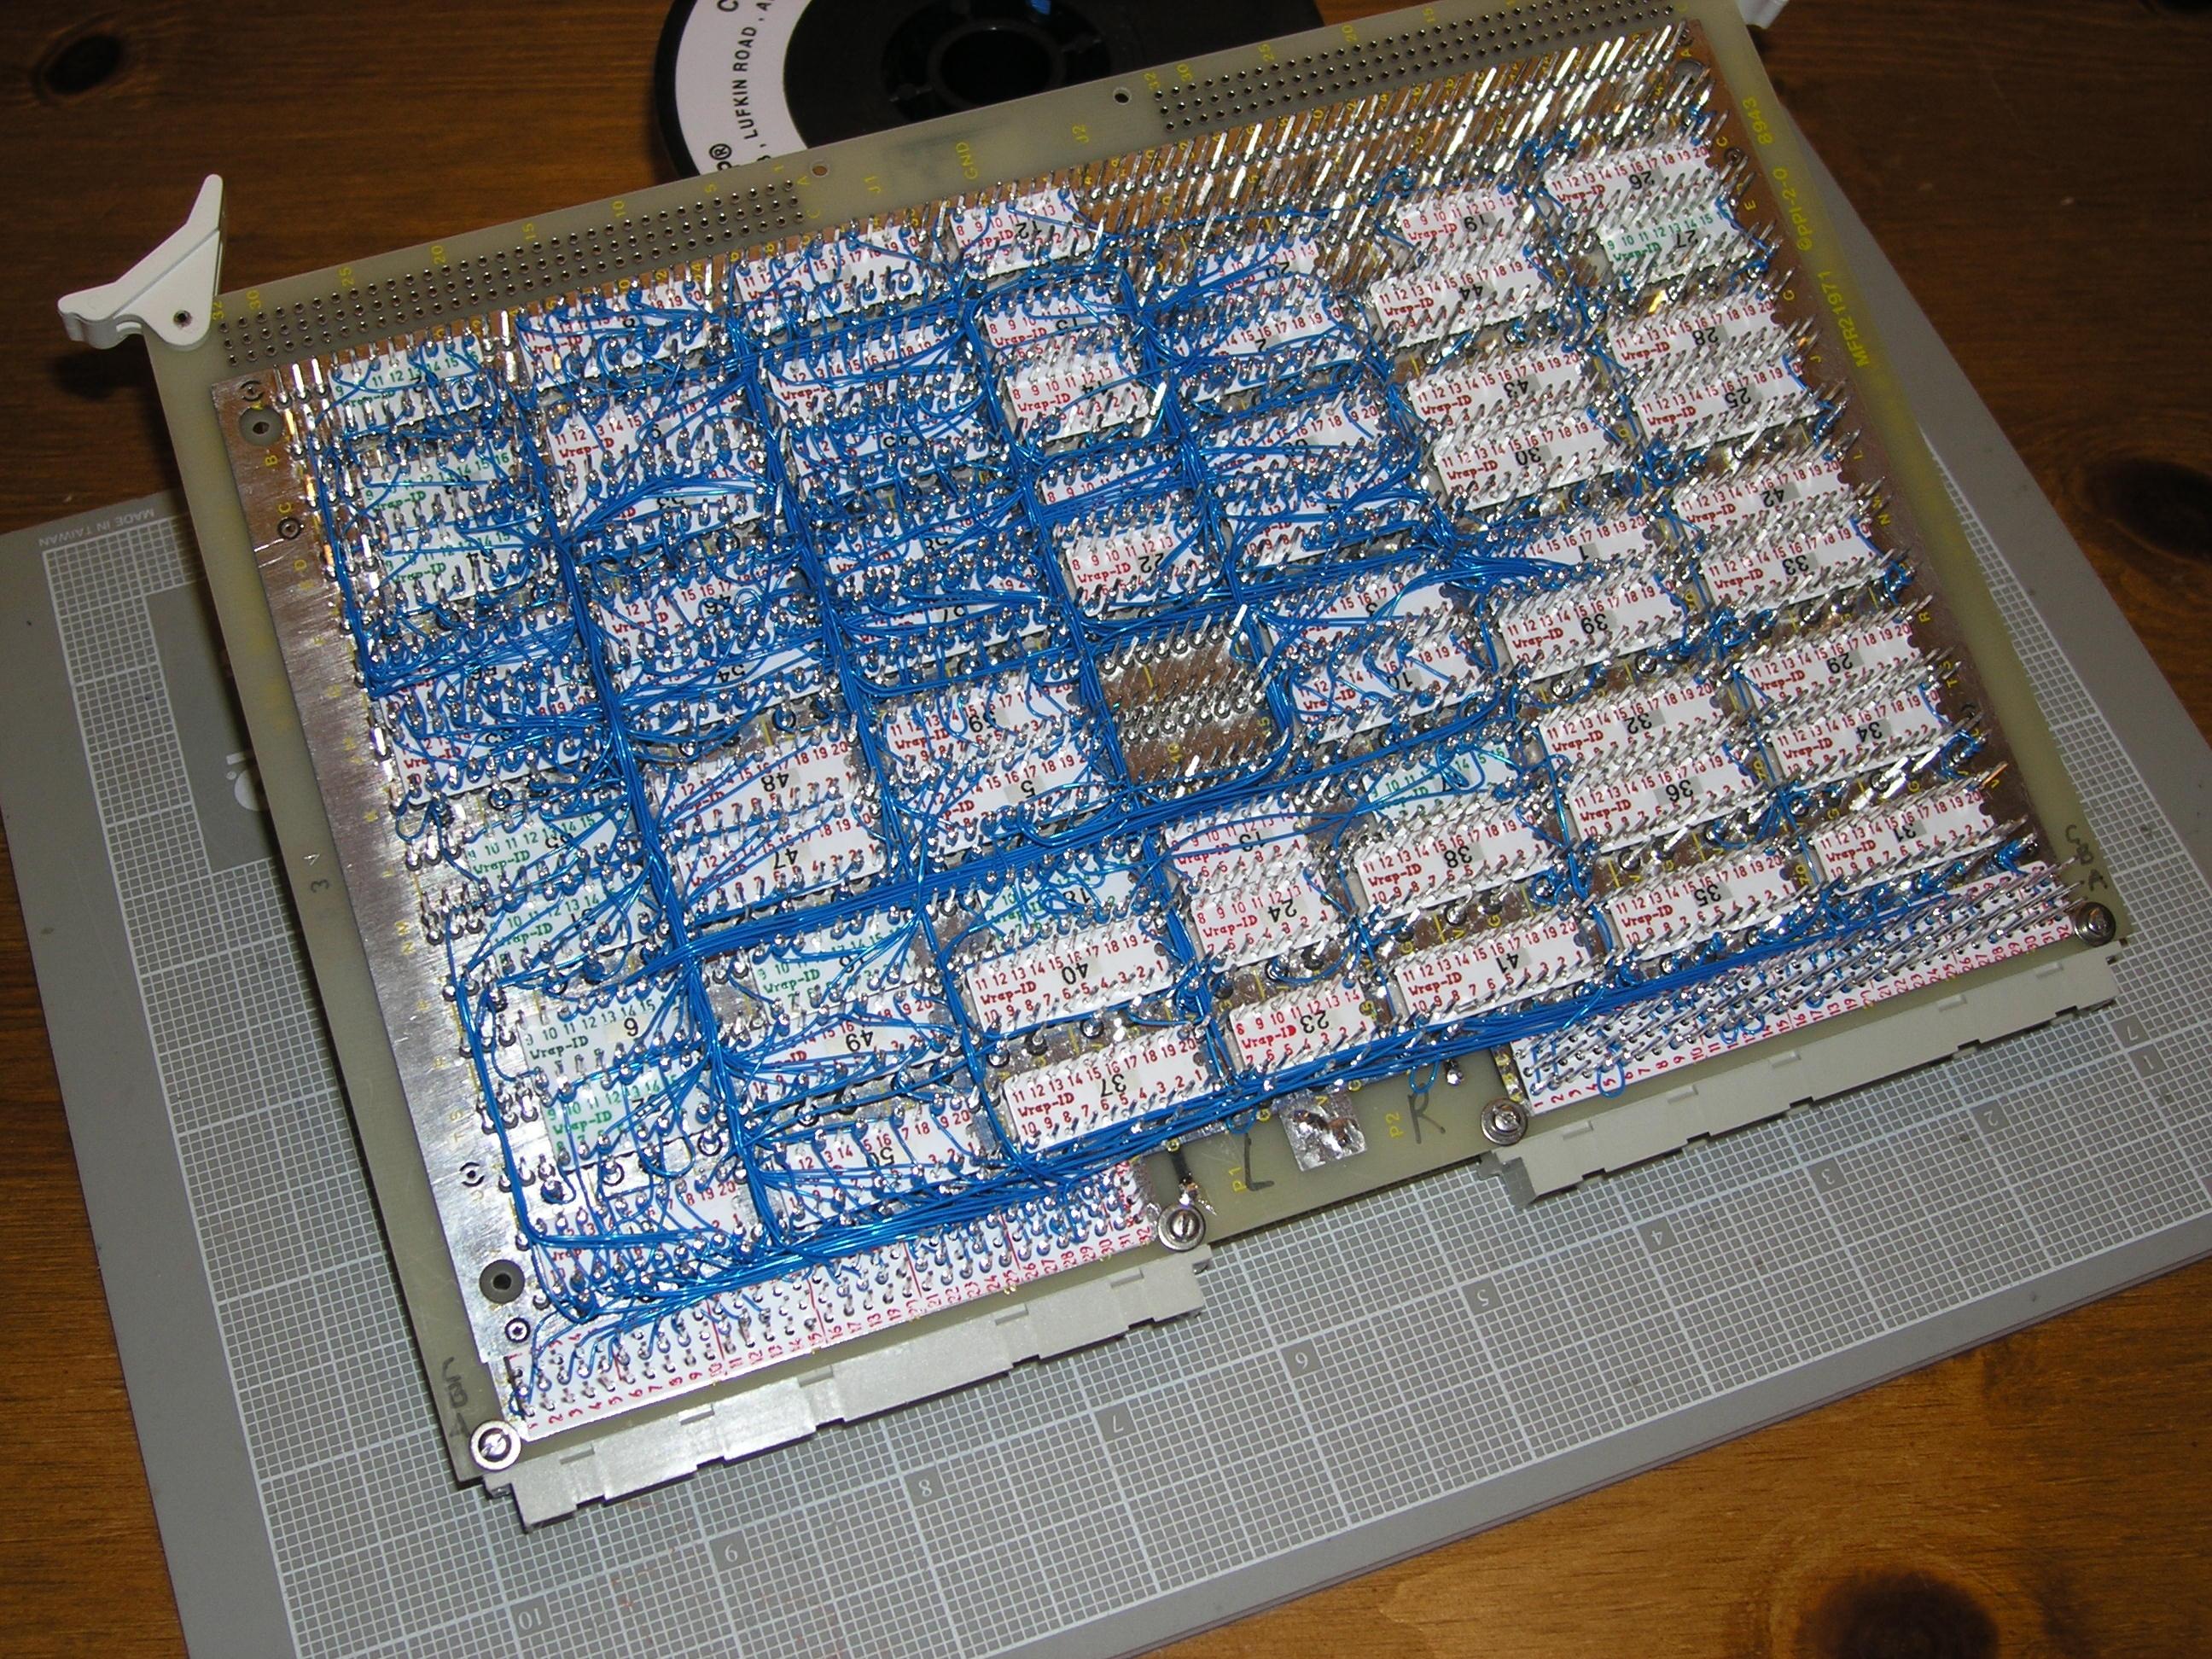
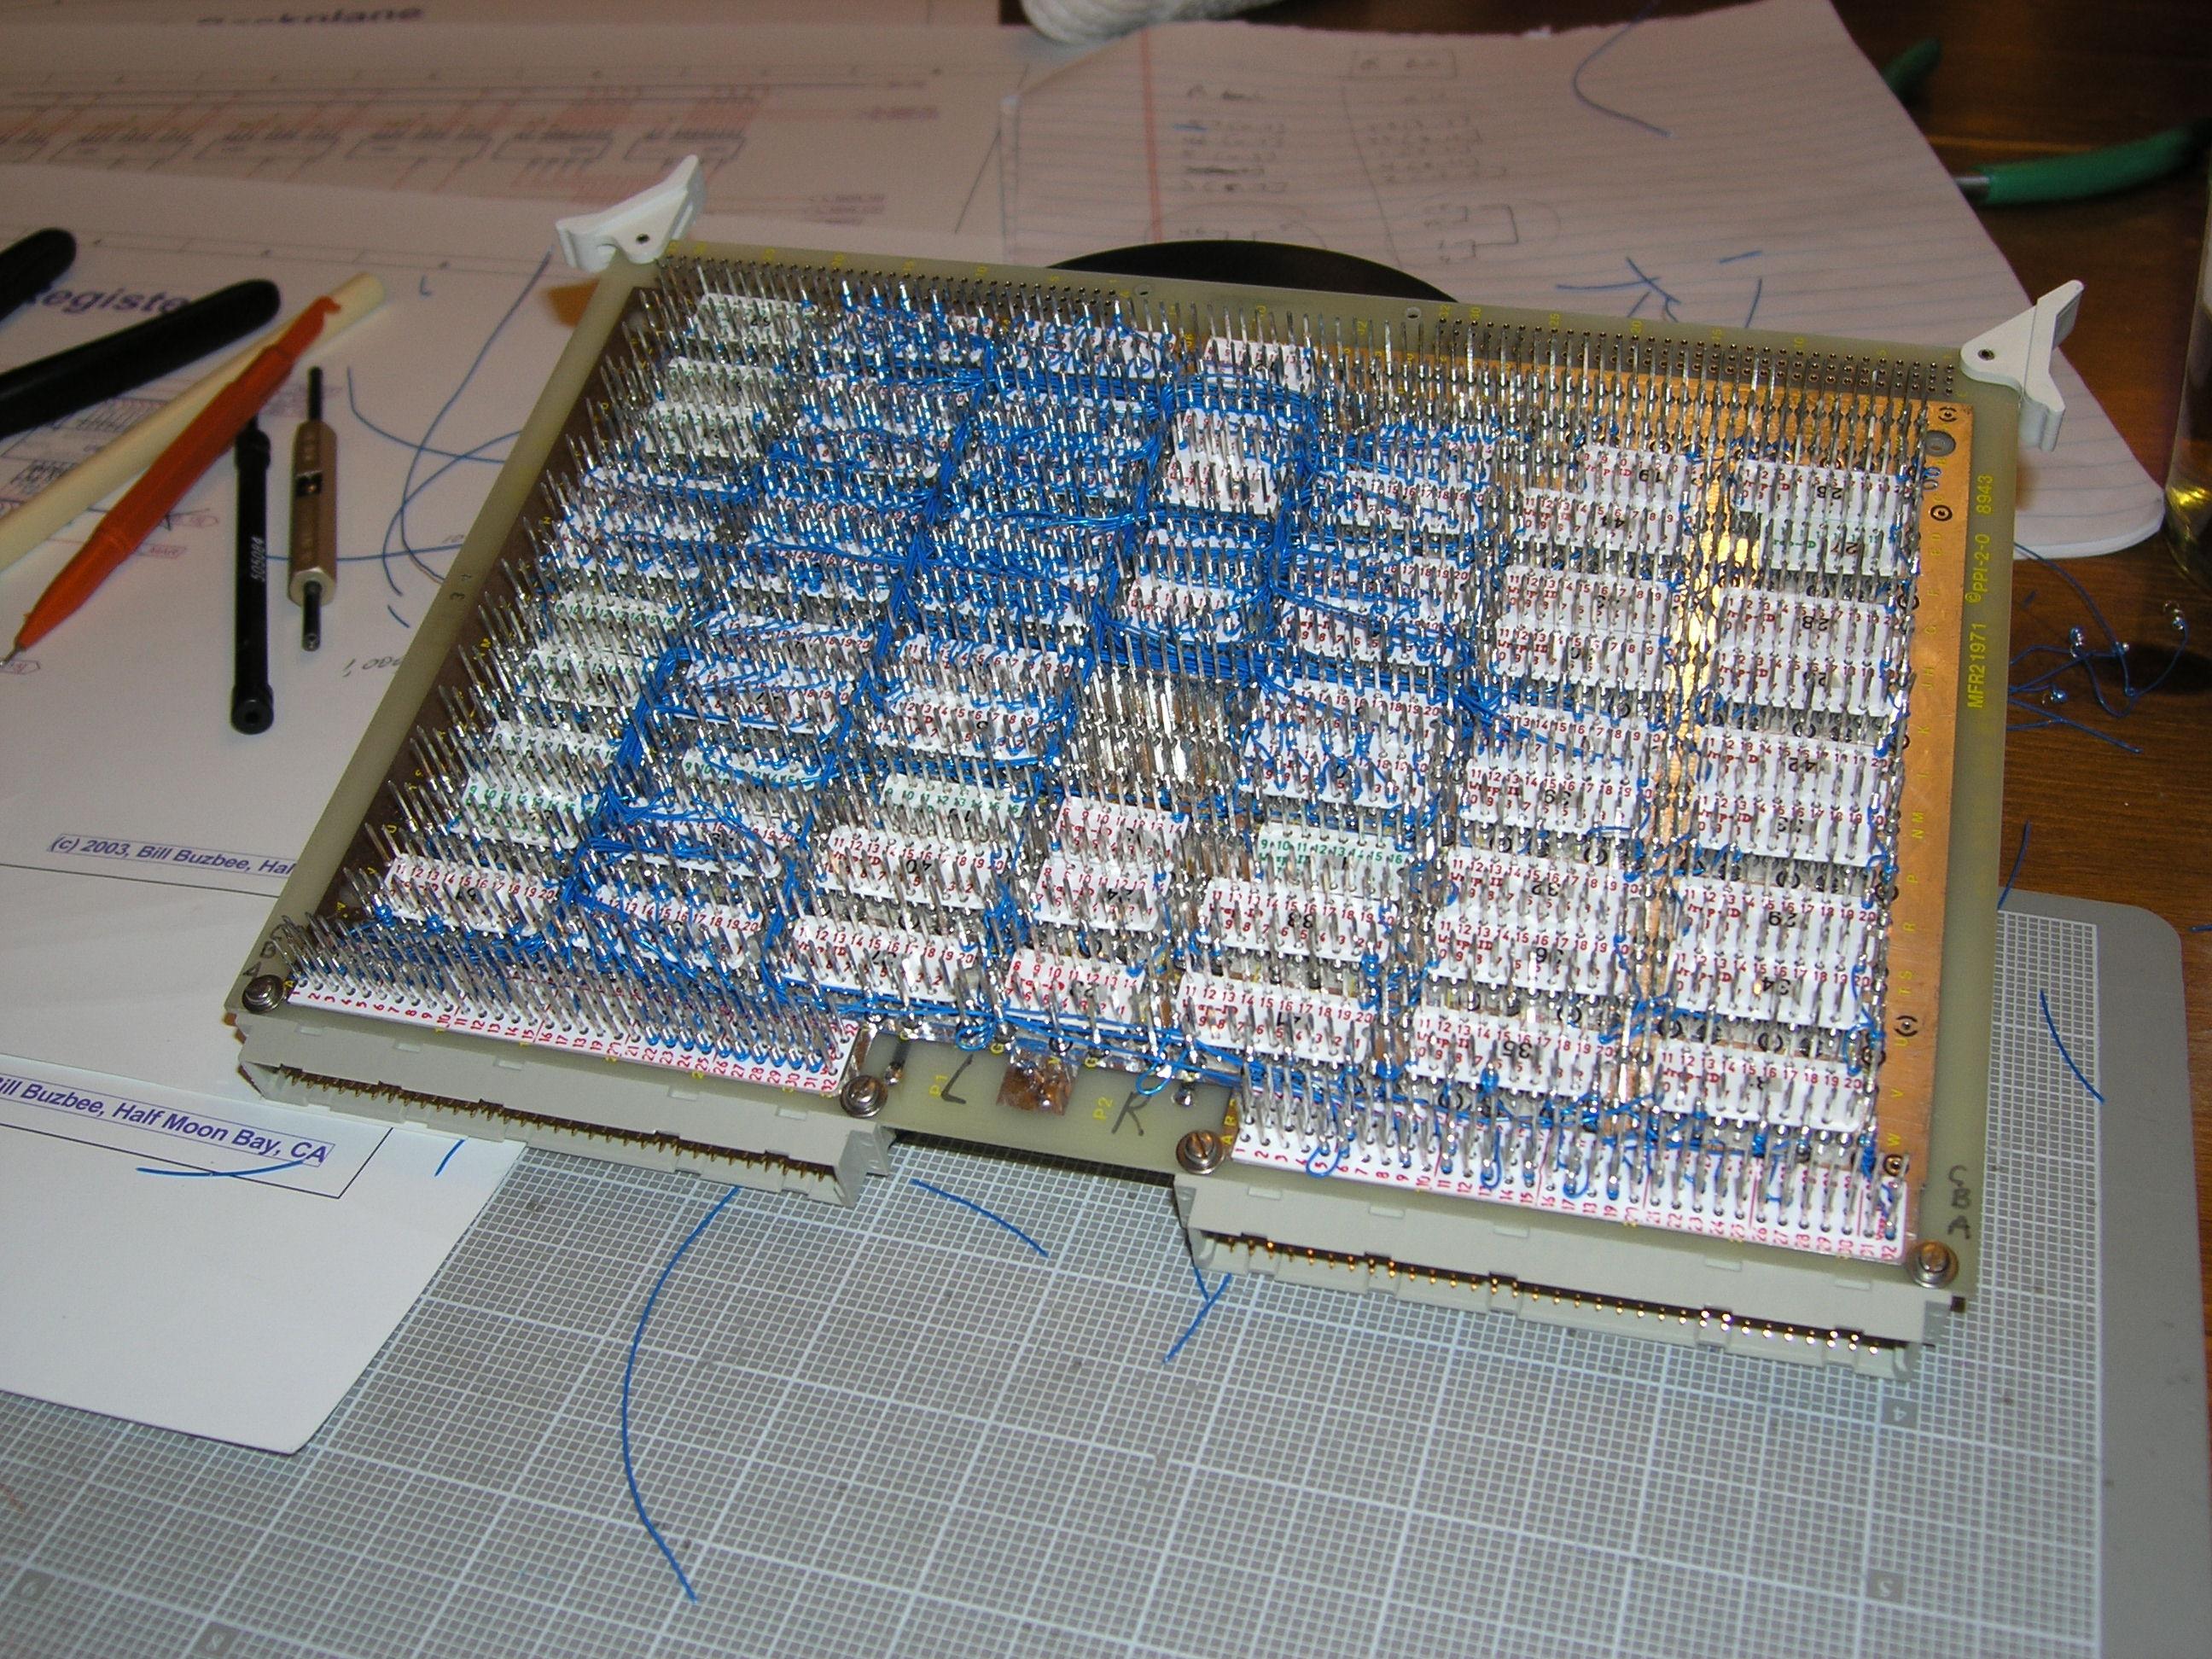
4/10/2004With an increasing sense of excitment and fear, I spent the day finishing off this last card. First was a complete beeping out of the card, where I found found two wires that had broken since the first beep-out. Both were in very heavy traffic areas, covered by lots of late wires from the L and Z busses. I've been doing all of the repair wiring with a hand wrapper, in order to avoid adding any more pressure to tight spots. Then, I soldered in the bypass capacitors, burned the EPROMs with the real microcode and the boot ROM with the fibonacci function test program. This was going to be the moment of truth - first attempt to run with everything in place. All I needed to do was install the rest of the chips, power it up and see if all of my hard work of the last three or four years had paid off. Shit. I installed everything but the four 74153s. Couldn't find them. Searched my parts bins, looked everywhere. Damn. I must have left that line off of my order, and never bought them. Damn, damn, damn. Tommorow's Easter, so even if there were a parts place open tommorow (Fry's might have these), there's no way I'd be able to bail out on the family events to go chase them down. I'll have to wait until Monday night to see if this thing is going to fly. Shit. 4/8/2004Partially beeped out the card - all of the new wires since the previous partial beep-out (cheated a bit, though - just check the first and last pins in busses). I will do a full proper beep-out, but I succumbed to wishful thinking and decided to push for an alu test. The simplest thing would be to fetch an instruction and advance the program counter - so I populated just enough of the card to support that and gave it a whirl. No luck. Spent an hour debugging and finally discovered a miswiring in my backplane. I had beeped that out a year-and-a-half ago when I did it, but obviously missed something. So, I'll add that to my proper beep-out list and approach the bring-up the way I should - a little bit a a time. More details of my "feeling lucky?" bringup attempt in the diary. As far as the ALU/register card goes. I need to complete the beeping out, and solder in the bypass capacitors. This should happen over the weekend. I haven't yet attempted to repair the backplane either - will shoot for this weekend for that as well. 4/6/2004WooHoo! The card is wrapped! I still have to beep out everything again, and no doubt will find some mistakes. But damn, it's good to be basically done with wire wrapping. This card was brutal, but I'm glad I saved it for last. I'm a vastly improved wrapper now that I was four months ago. I think after this is over, I'll never want to see a wire-wrap gun again. Looking over the card, I'm generally pleased with my floorplan. There are only a couple of places where I had wire traffic jams. Overall, the wires are quite balanced. This is a result of good device placement. Could have been better, of course, but it worked out pretty well. Here's a picture:
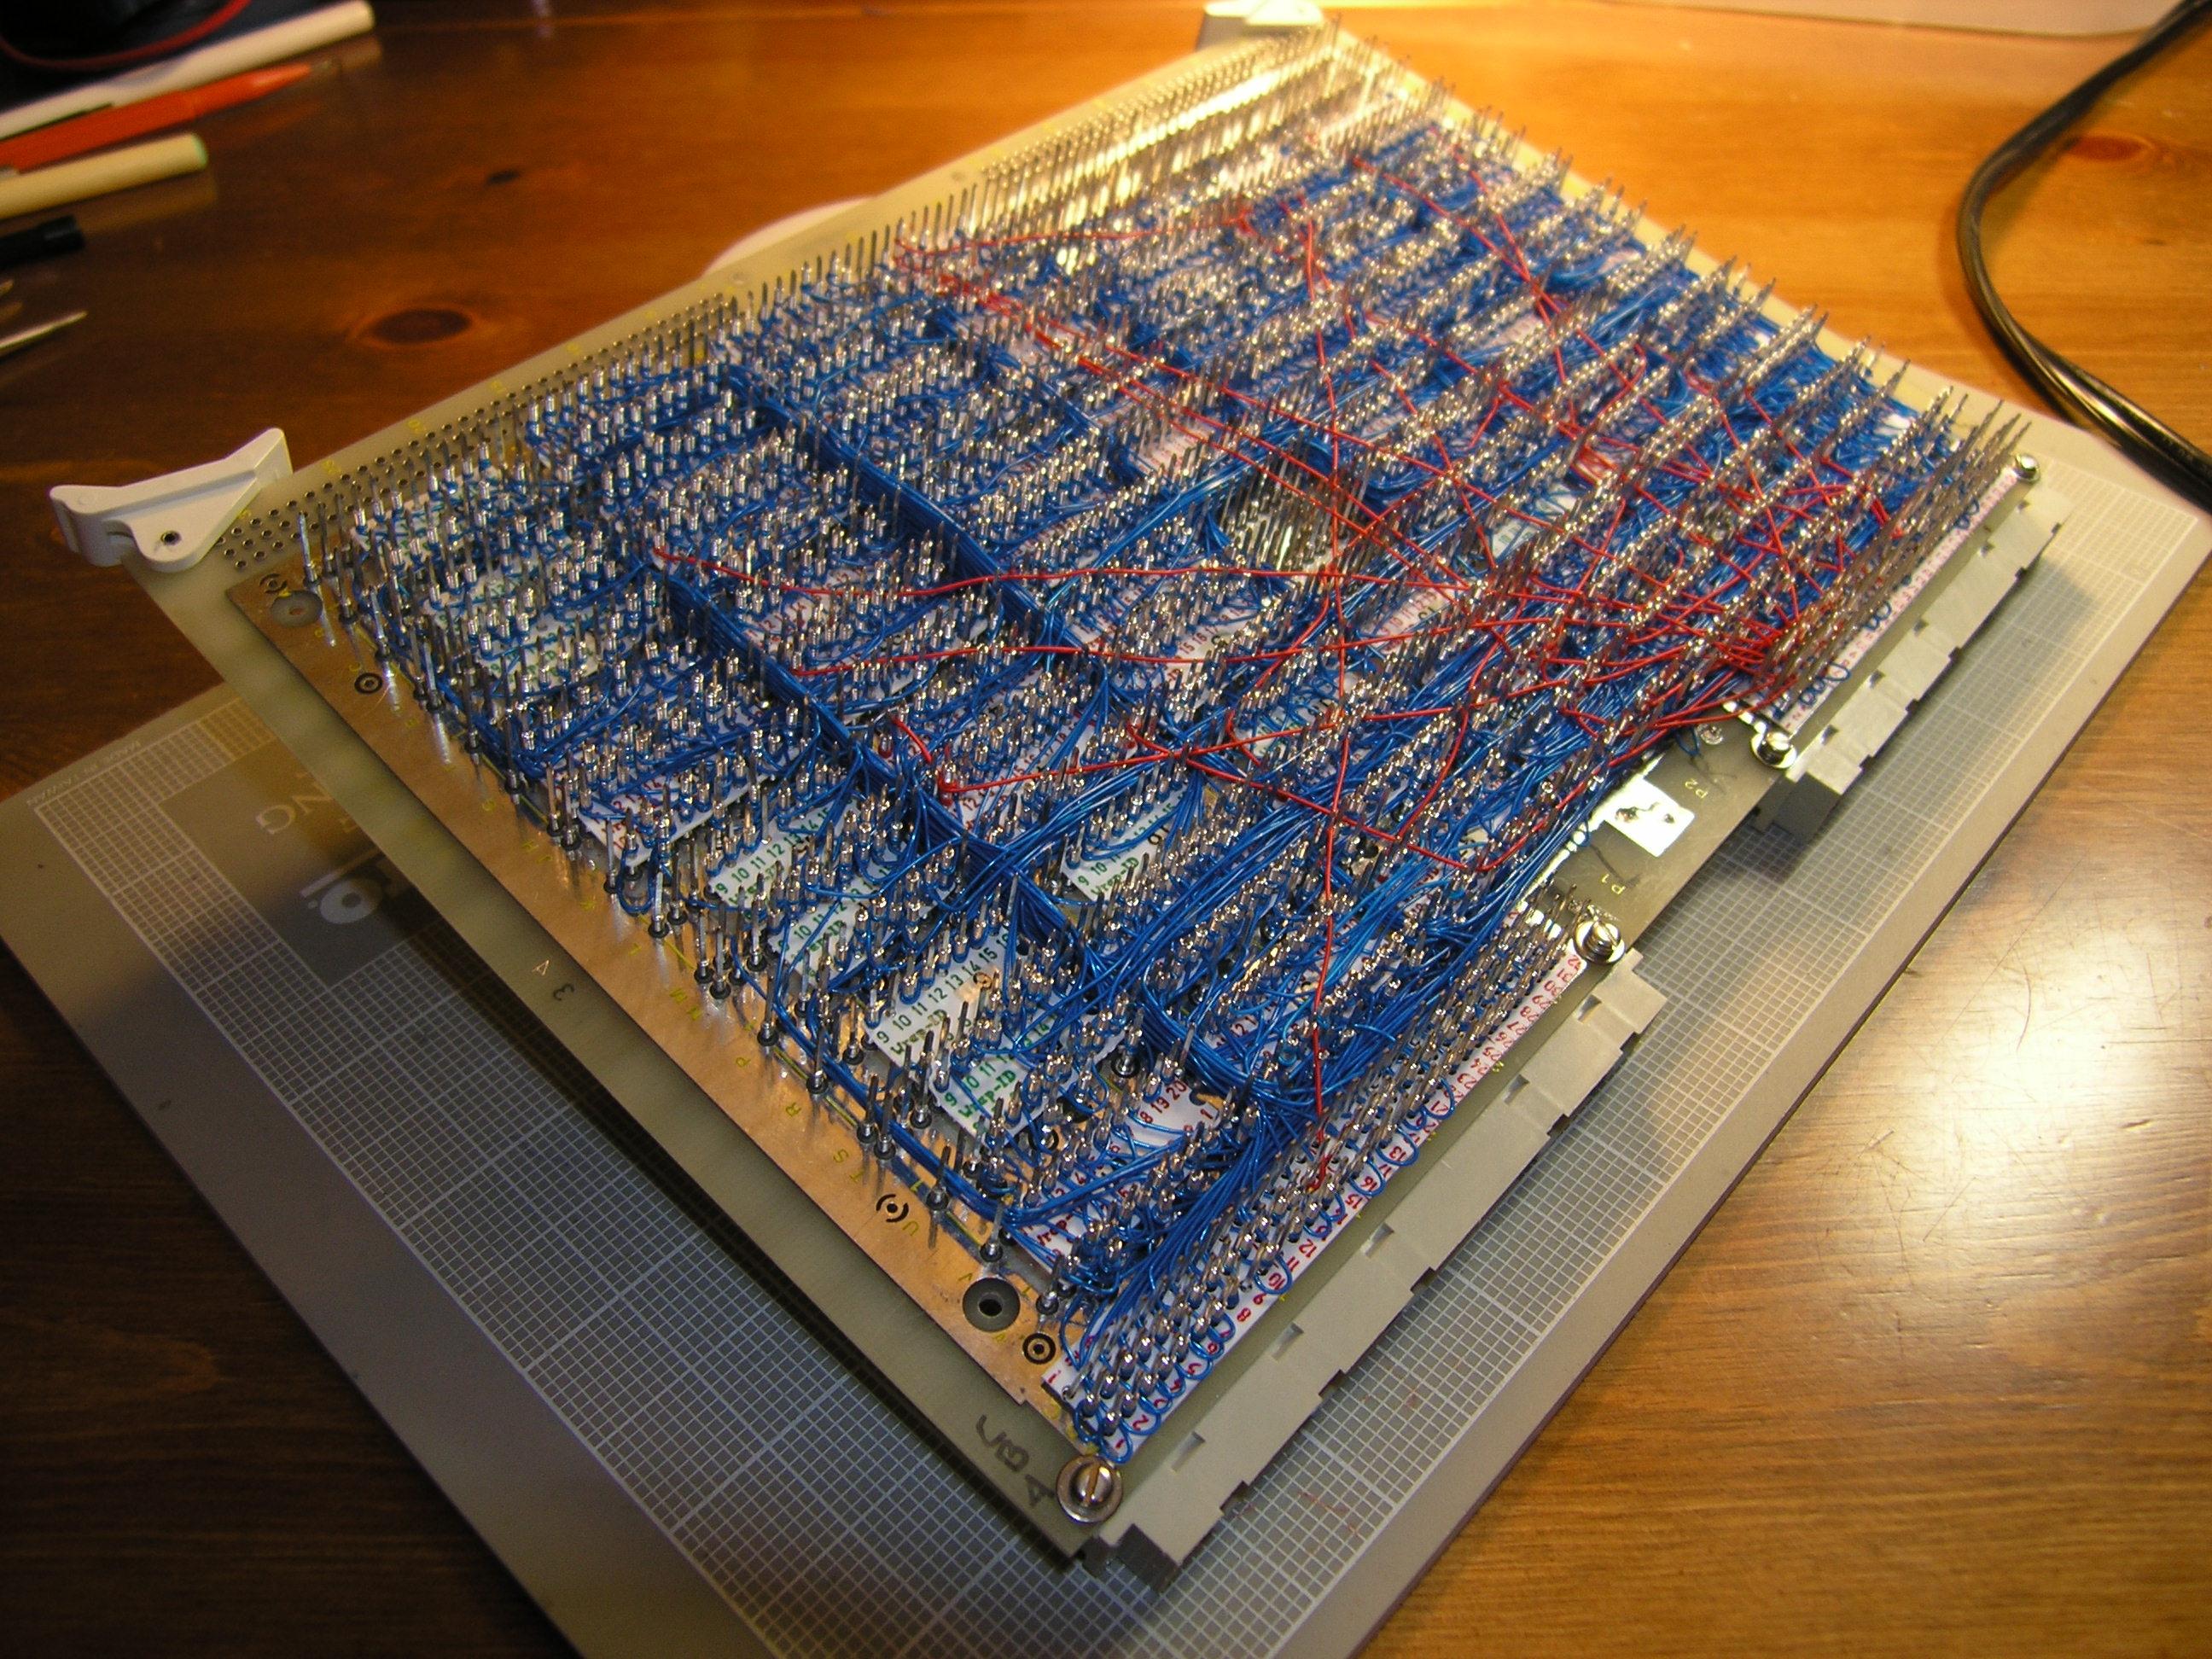
The red wires make it all look a bit sloppy. I'm probably being foolish, but my intent here was to isolate the edge-sensitive signal lines and run them outside of the normal wire channels to minimize cross-talk where it matters. Anyway, here's another angle:
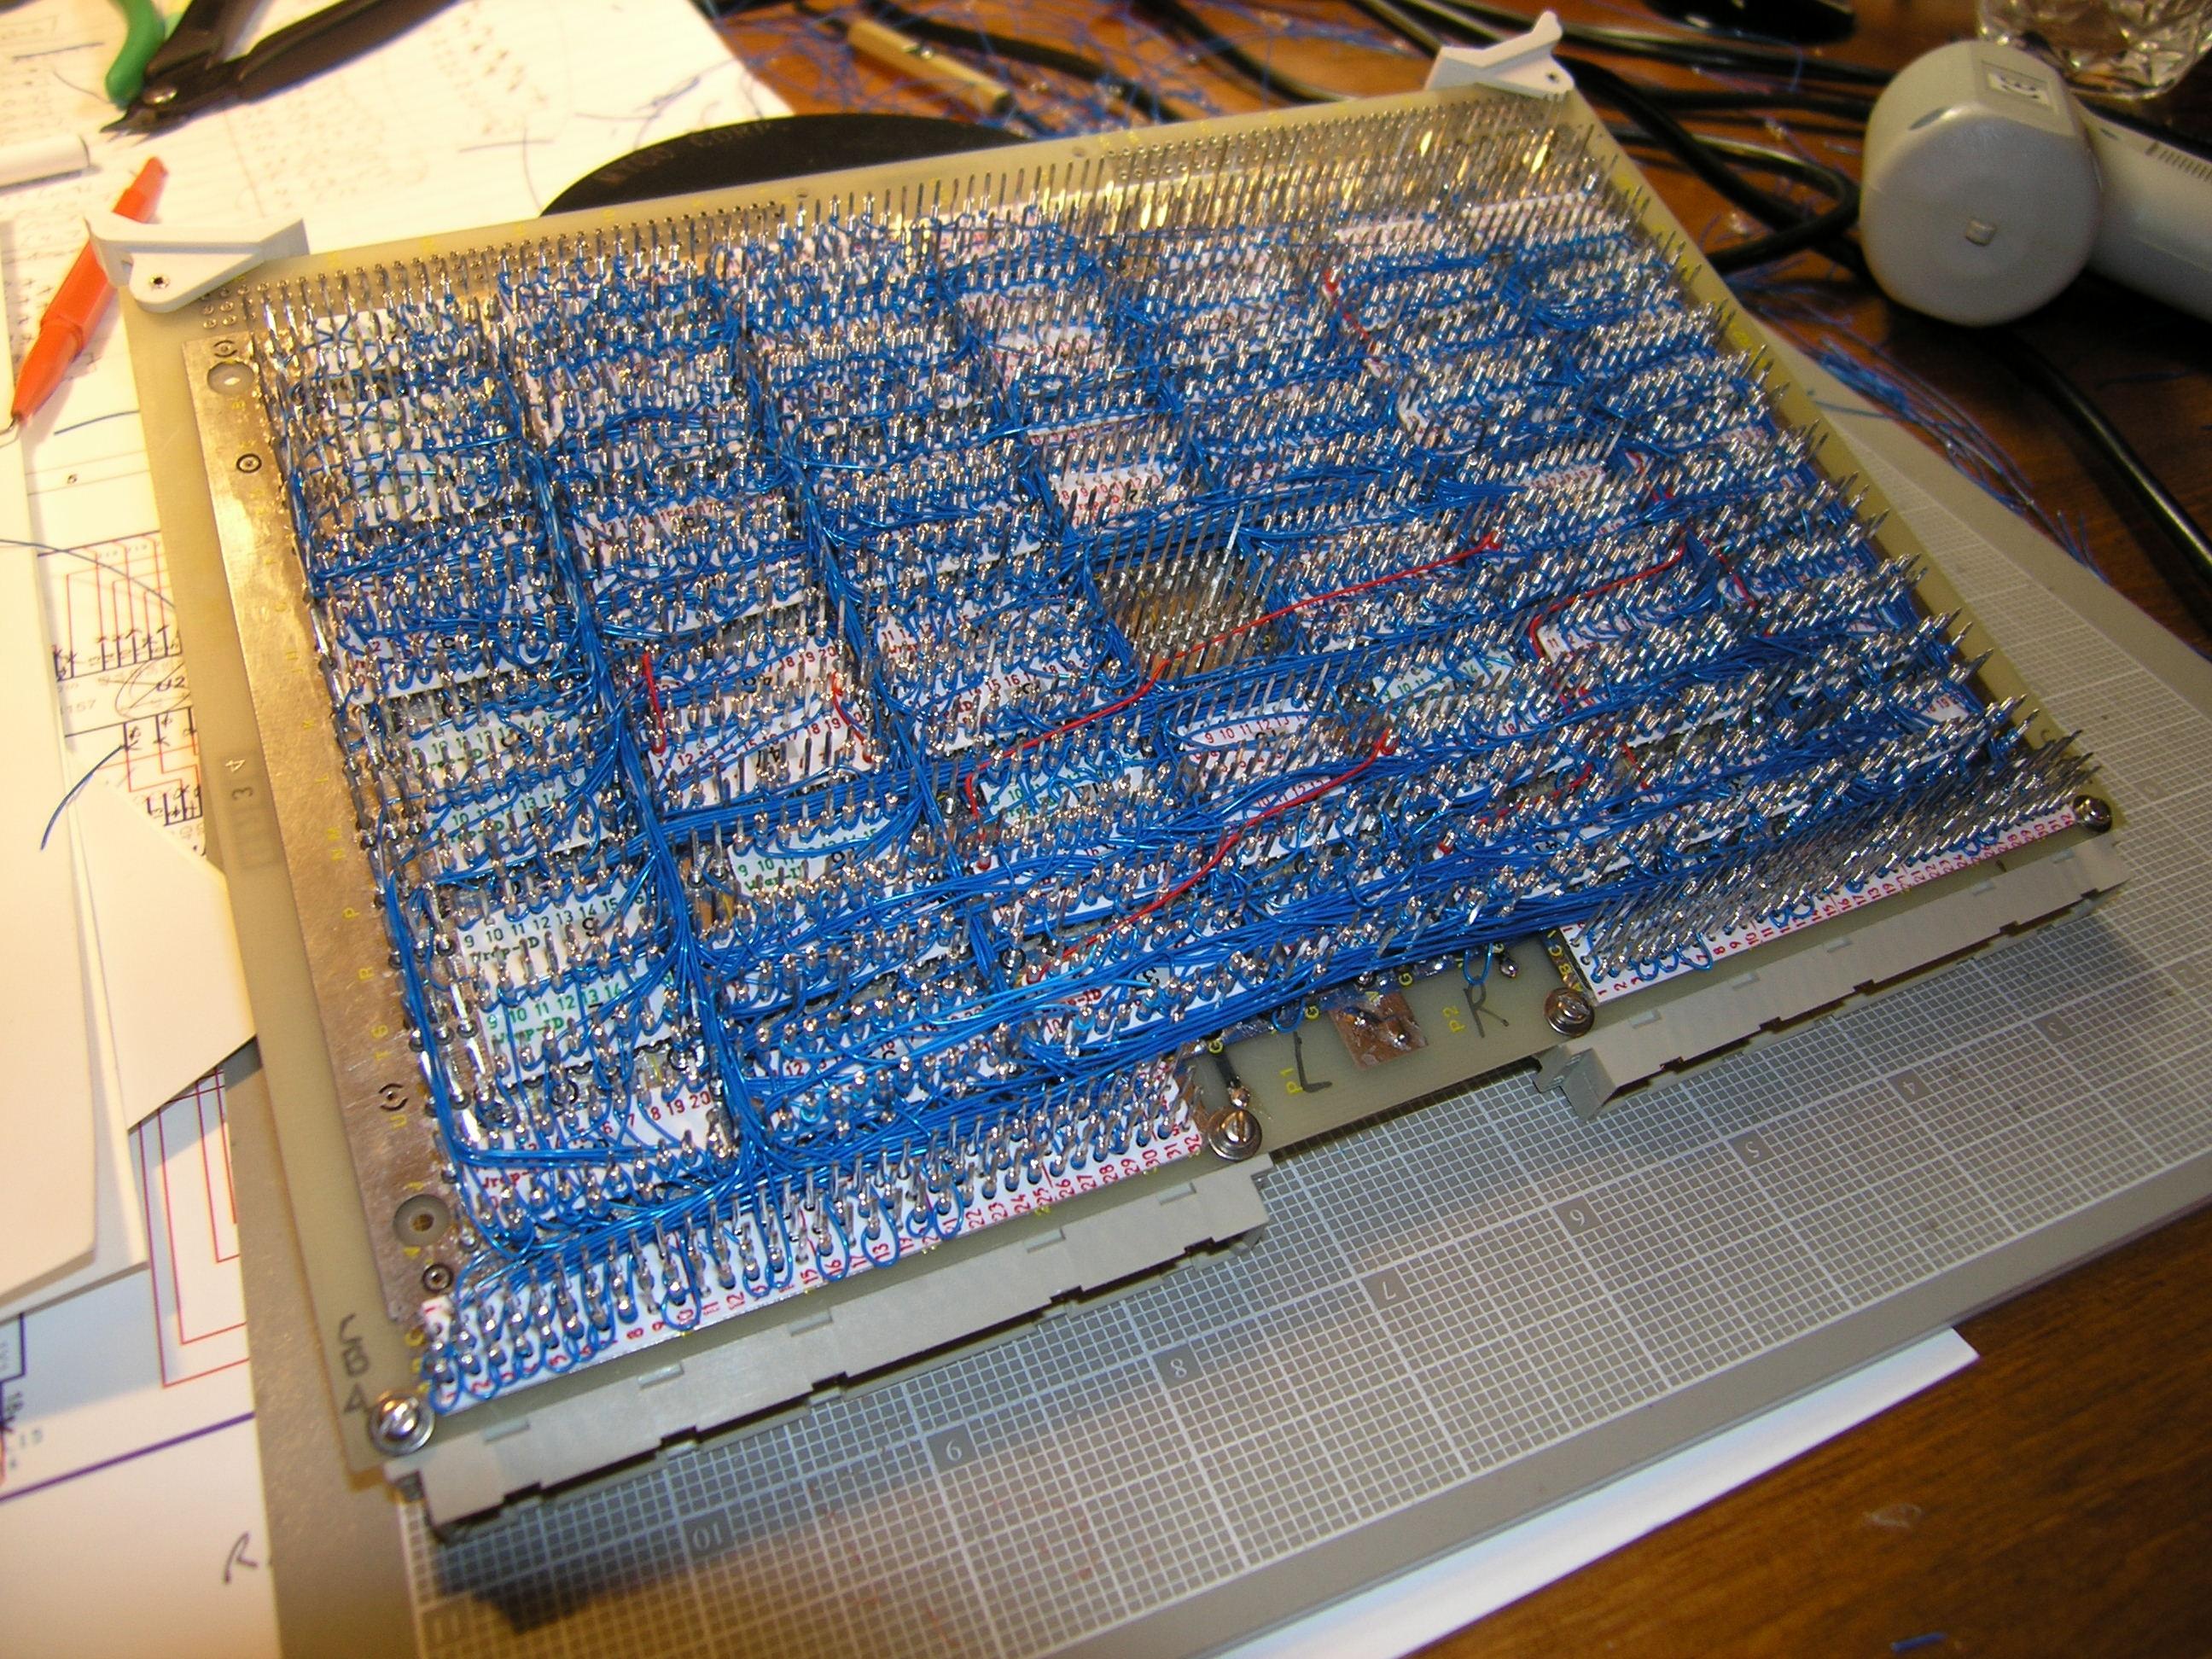
Besides the beeping out, I still need to enhance the temporary front panel assembly to support viewing register contents, and I've also got to solder in the bypass capacitors. While this is going on, I'll think about my bringup plan. So far, I'll probably start with populating the card with only the MAR and control bit flip-flops. That will enable me to make sure the rest of the machine still functions the way it did when I was using a dummy alu/register card (with some control bits wired low). After that, I'll probably go ahead and fully populate the board and just try a full-blown test of the fibonacci test program boot ROM using the real microcode. The liklihood that it will work first time is pretty low, but you gotta try. That will probably happen Friday or Saturday. 4/5/2004Hard for me to believe, but I'm approaching completion - there are just under 100 wires to go. The wrapping is slow, but I'm getting better at it. I've finished off the L buss, and if I continue to improve, I think I can completely finish the wiring on this board in my next wiring session (perhaps tommorow night). After that, I need to beep everything out, solder in the bypass capacitors and install the devices. At that point, the basic computer is complete and bring-up begins. If everything goes well, I could actually have M-1 running within a few days. Exciting stuff! Oh, I also plan on doing a bit of an enhancement to the temporary front panel. I'm going to add 4 HP hex displays and a rotary switch to enable display of all registers connected to the L bus. I'll also add a pair of HP hex displays to show the current opcode. This shouldn't take too long. I'll need to swap out three chips on the front panel logic board to make this work. My front panel design assumes LEDs, and the way I'm driving them I have negative logic on the front panel assembly. The HP displays want positive logic. Luckily, I buffer all signals going to the front panel, so all I need to do for this is to replace inverting bus drivers with straight-through ones, and visa-versa. Here's what it looks like tonight:
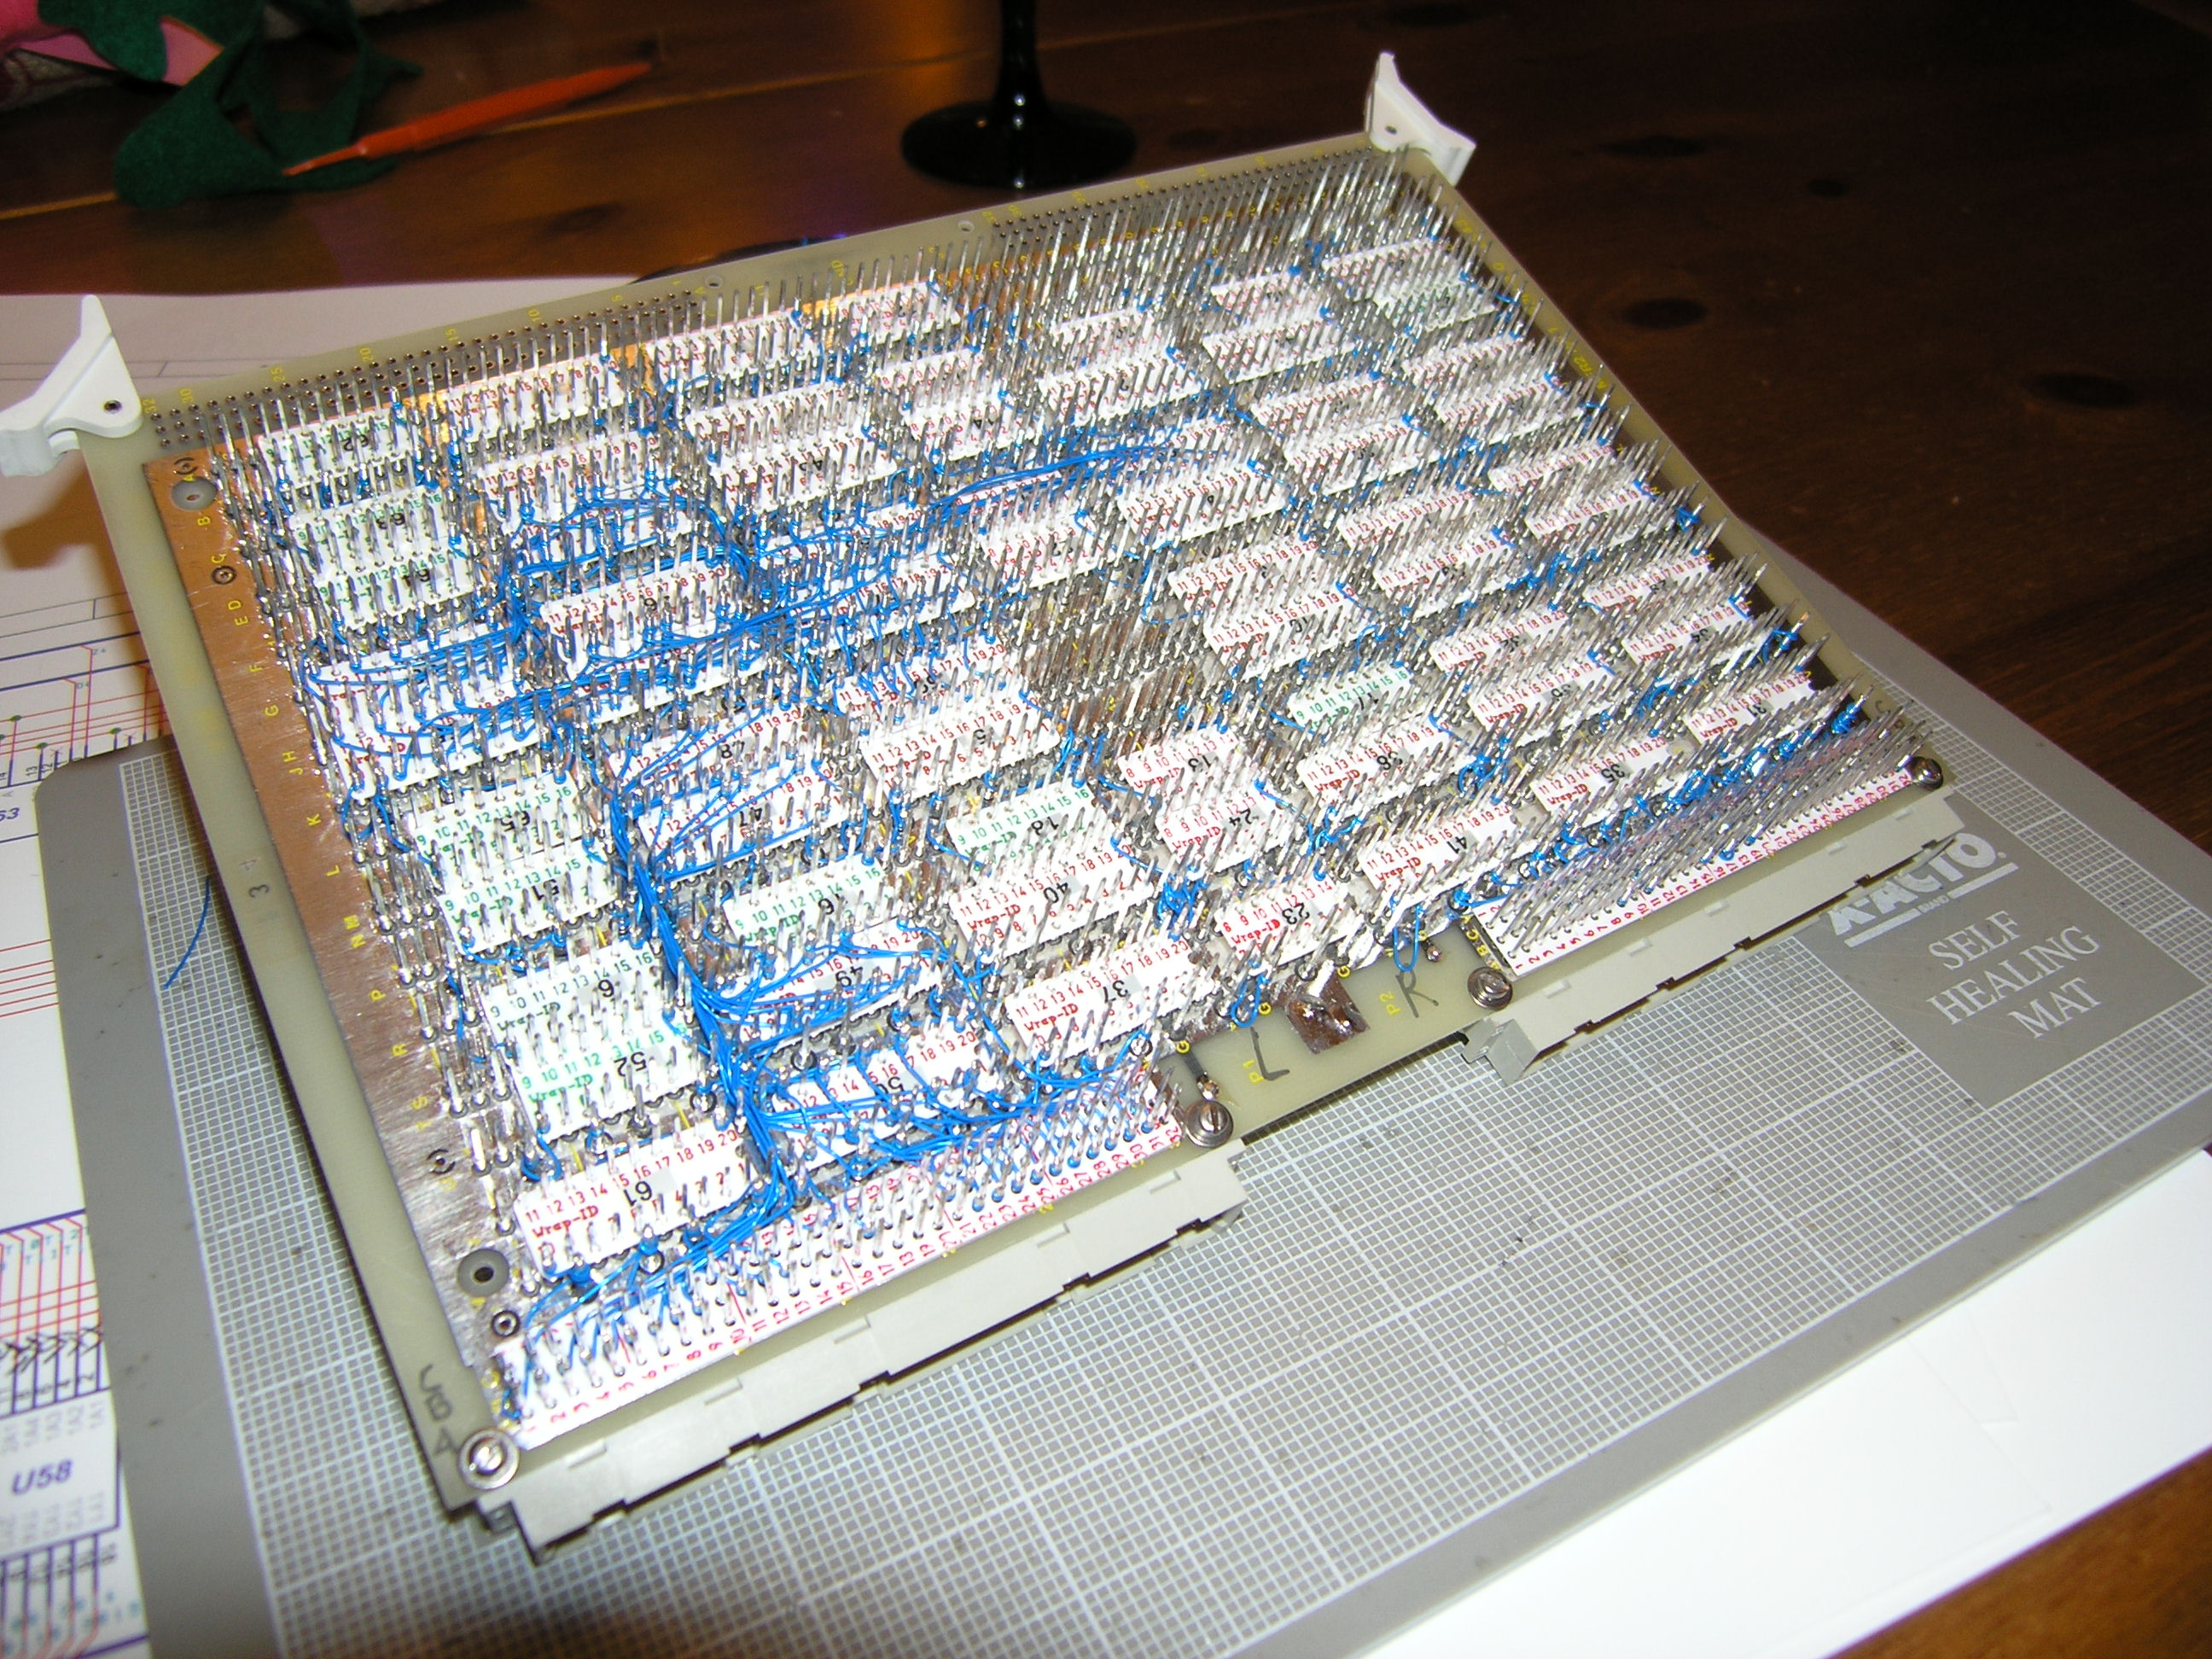
4/4/2004Best wrapping sessions ever - I breezed through all of the 1st level Z and L buss wraps. I'd expected that to take several days, but it went incredably fast. Guess I finally got the hang of it - at least for 1st level wraps. Unfortunately, all of the remaing wraps are 2nd level. I started on them, and it was like I'd never wrapped before. It took four or five tries to get each wire on. I'm pretty consistent with the first wrap (I discovered a trick of loosly wrapping the free end through some nearby posts to give it the right amount of tension). However, I'm usually snapping off the 2nd wrap. I think it's also a matter of getting just the right amount of tension, but it's much harder to do by slightly pressing on the wire with my pick tool. Well, I'll bet I get better at this after a few more hours of trying. Hard to estimate when I'll get the wiring done. If it would go as fast as today's 1st level wiring, I'd be done tommorow night. However, it will likely take me all week. I also want to add some features to the temporary front panel before I try a full bring-up. With luck, next the big day of completion of the basic electronics will happen next weekend. Anyway, here's what the board looks like now:
4/3/2004Beeped out all of the completed wires, and discovered 5 problem - two of which were broken wires. The first of those was completely snapped, but the second was the kind I'm really afraid of. It was snapped inside of the insulation, but apparently the two broken ends were touching inside the insulation. I discovered this while fixing another wire in the same chain. I got intermittent continuity failures, until I tugged on all of the wires (and then it failed consistently). This is the kind of thing that can really cause problems later. I wonder how many of those exist that I haven't caught. Scary. I'm not sure what to do about this kind of problem. Anyway, I'll start on the 1st level wraps of the Z and L busses tommorow. 4/1/2004Only 400 or so more wires to go. The first 200 should go pretty quickly (1st level busses), but the last two hundred are going to be tough. Still, I see the light at the end of the tunnel. Finished off the miscellaneous wiring on the card. What's left are the L and Z busses, and the edge sensitive signals. My next step is to beep out all of the connections I've made so far with a continuity meter. That may take a couple of sessions itself, and given that this is another child birthday weekend (Maia - turning 6), I may not start on the 1st-level L/Z wraps until next week. Here's what we look like today:
3/31/2004Took my time today. Trying not to rush things to avoid dumb mistakes. Anyway, I'm just one session away from completing everything except for the two big busses - Z and L, and the edge-sensitive signals. After the next session, I'll beep out all of the completed connections and correct any mistakes I find before I tackle L and Z. Here's what it looks like now:
3/30/2004Nothing special today - just a short wrapping session.
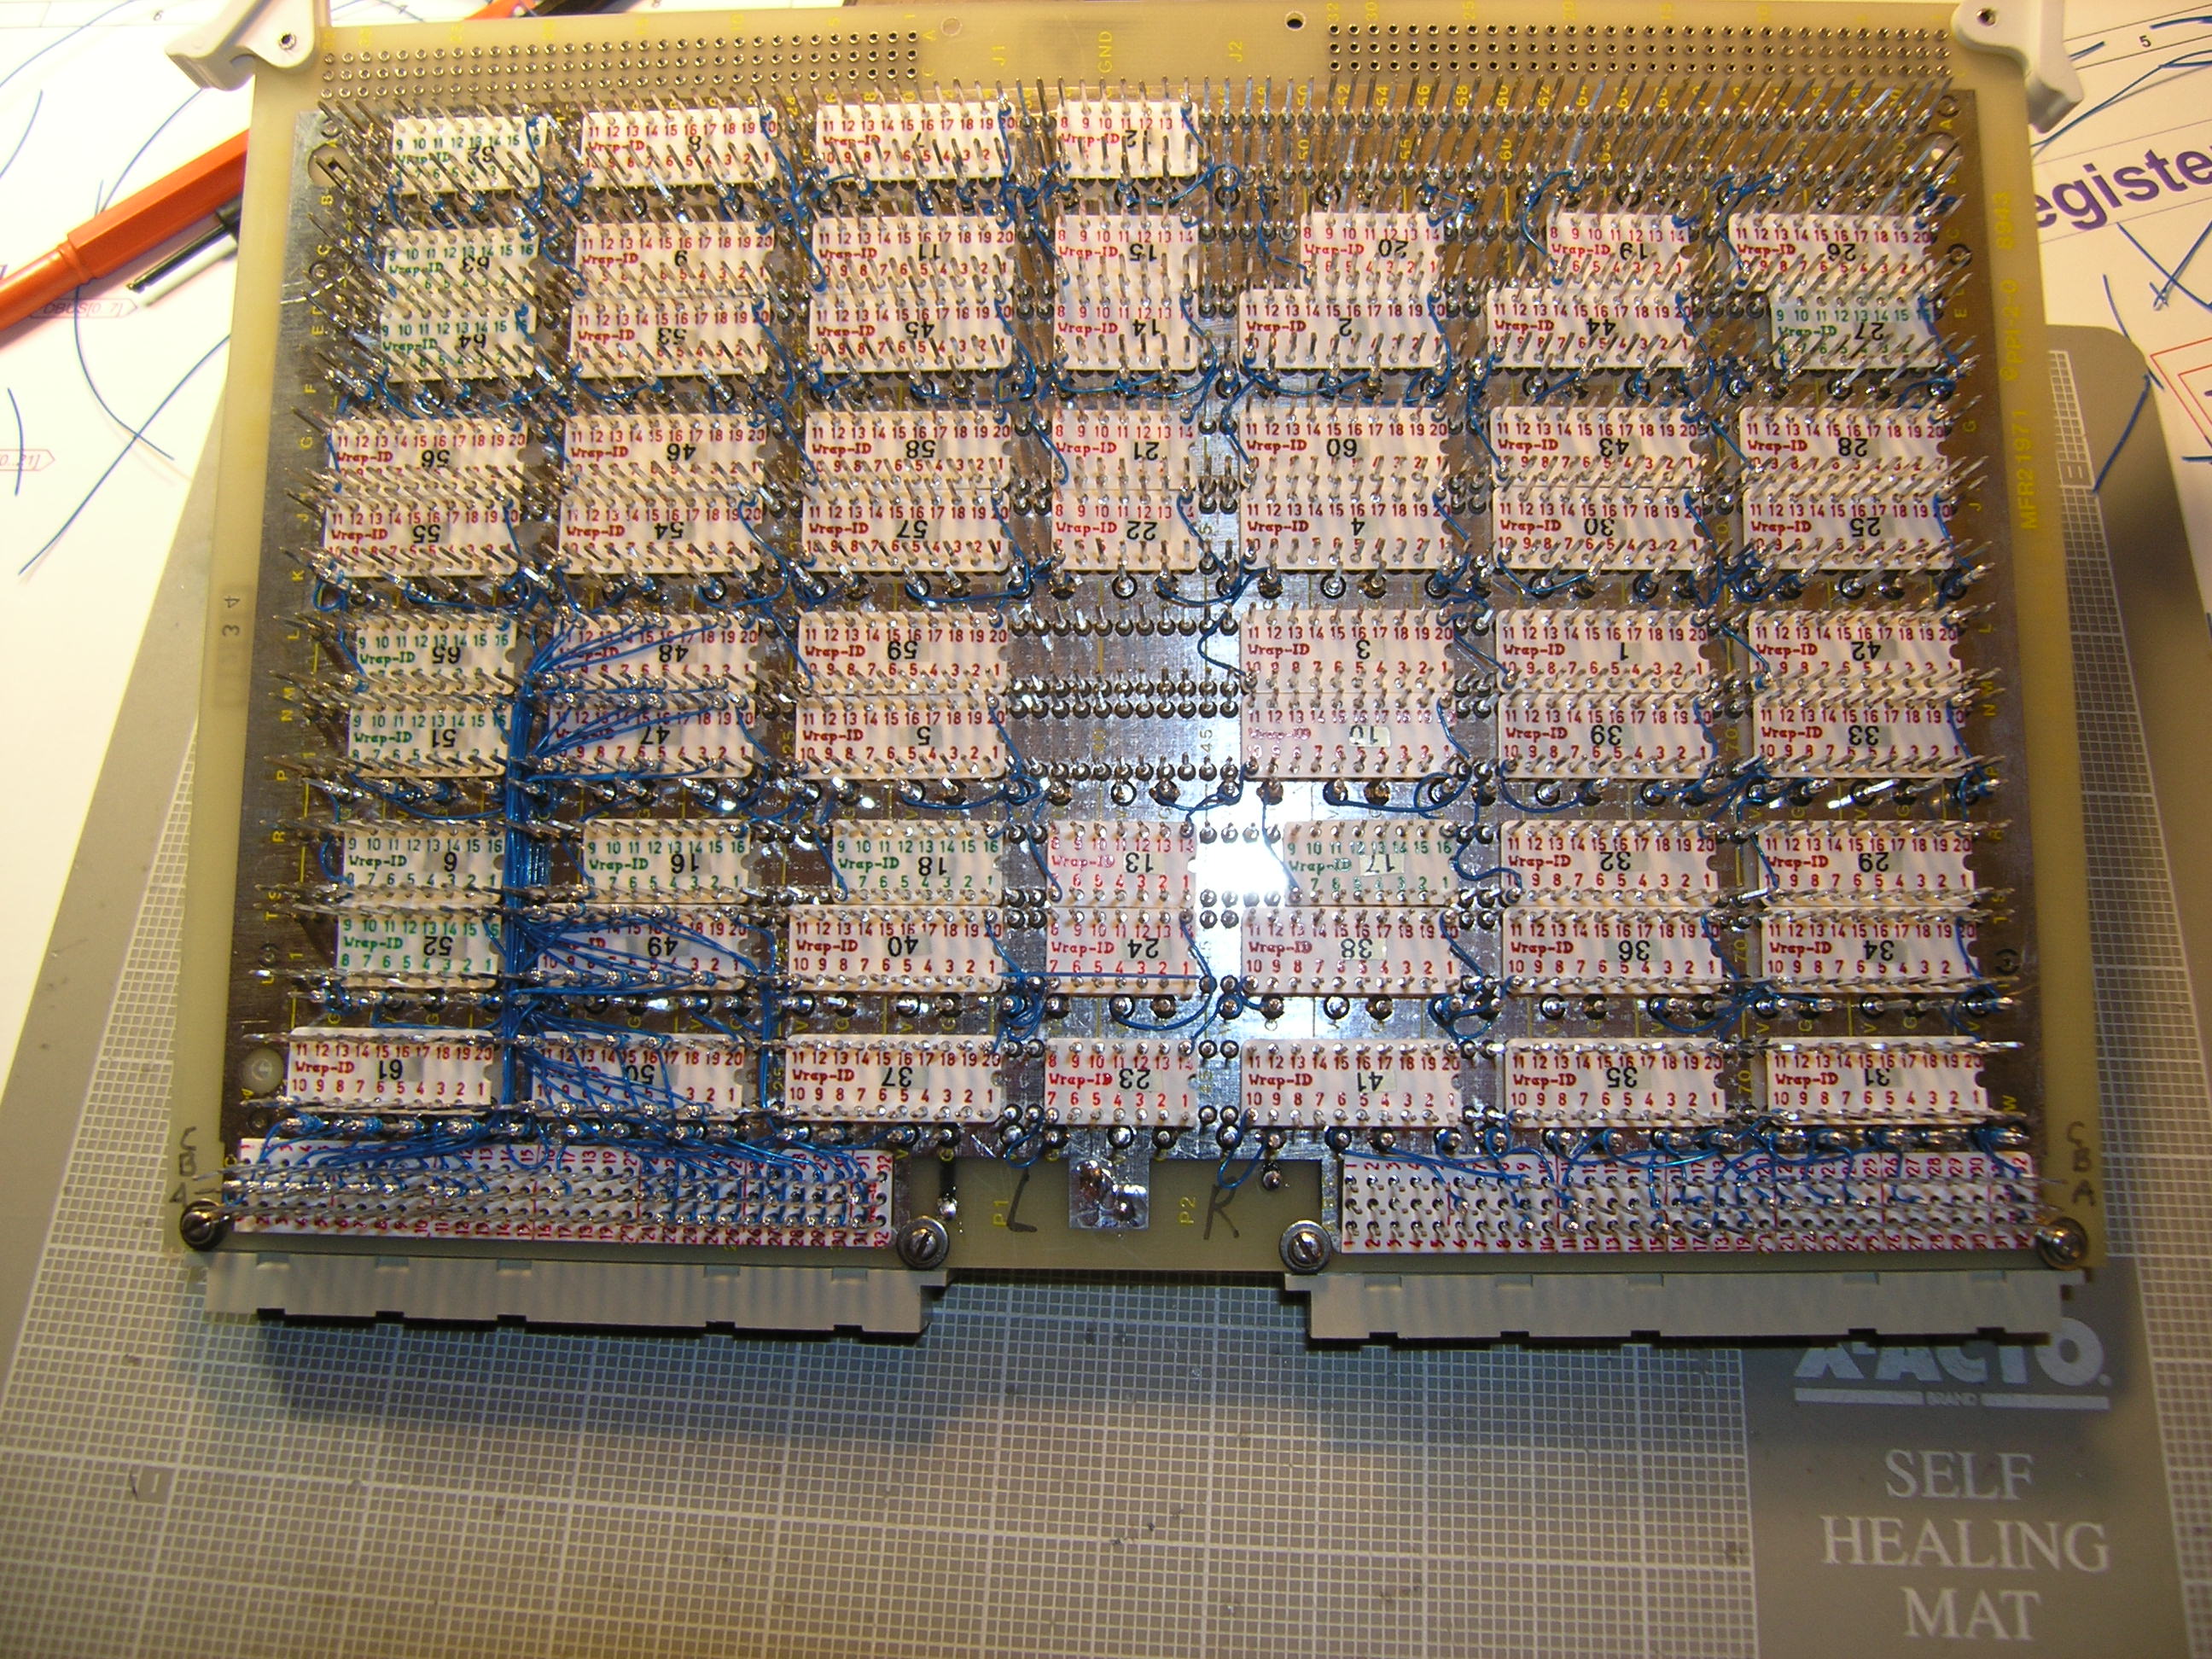
3/29/2004Lots of wires in tonight. It's getting close - so it's tempting to push on even though I'm tired. Stayed up way too late, which is going to mean more mistakes. Slow down... Anyway, the D bus is in, and that is all of the simple busses. What's left are the Z and L busses, which touch almost everything on the card. My current strategy is to put off the L and Z busses and fill in all of the non-bus signals (not including clocked signals). I've done this for the MDR and spec_reg schematic sheets, and it shouldn't take me more than a session or two to get to that state for the other sheets. Then, I'll put in the first level wraps for both the L and Z busses, followed by the 2nd level wraps. I'll finish off the card by putting in the edge-sensitive wires (using red wire). Oh, and I've also decided to do a full beep-out of the card just before starting the L and Z busses, and will then go back and do it again after everyting is complete. It's getting exciting - I may be only a few weeks away from a full test. Tonight's picture:
3/28/2004Birthday party weekend for the now 4-year-old, so didn't get a lot done on the project. Managed to put in a couple of short sessions, and completed the Q and R busses. I'm getting quite adept at 1st level wraps, and am doing a lot better on 2nd level ones. The trick on the 2nd level, at least for the first wrap, is to loosely wrap the free end of the wire through a couple of nearby pins. The idea is to give it just a tiny bit of slack, but rely on the bends around the pins to keep the wire from spinning on the post. I've also had to deal with a few cases in which I'm having to put 1st level wires on a pin between two pins that already have two wraps. It does present a bit of a challenge. When I get to my big busses - L and Z - I think I'll do them as a group and do all of the 1st level wires first. Here's what it looks like now:
3/25/2004Put in the T bus tonight. The 1st level wraps were quick and without error. Had a rough time, though, with 2nd level wraps. This is going to be a tough card - lots of two-level wraps. I'm also making it a bit more difficult for myself. The best way to do it would be to do all 1st level wraps on the entire card (or at least on a device by device basis) and then do all of the 2nd level ones. That way you're not trying to do a 1st level wrap on a pin that is surrounded by pins that already have two wraps on them. That case makes it difficult to fully seat the wire-wrap bit. However, I've chosen to do this board a bus at a time to keep myself from getting confused. Not sure it's the right choice. Anyway, here's tonight's picture:
3/24/2004Good wrapping session tonight. Finished the board prep with the device vcc connections, and had time to wire up the MAR bus connections.
3/23/2004Finished wrapping the power/ground lines from the backplane connector, and did all of the ground connections to the devices. Tough wrapping session on the device grounds. It was like I'd completely forgotten how to wrap wires. I probably had to make two or three attempts for every wire that went end. Towards the end, though, I started getting my touch back.
3/21/2004Didn't spend too much time on the project this weekend - allergies and work around the house. Did manage to label and place the wire-wrap ID tags. This time I used a little label maker, which I hope will prevent a couple of errors I had on the control board due to misreading of my own writing. Here it is:
Also decided that I'm going to get some of those little rubber feet with adhesive backs and place 4 or 6 of them on the component side of the board to provide support and a level surface for the wire-wrapping. Probably should have done something like that from the beginning. 3/18/2004Layout was quite a challenge. By doing a good job I could significantly ease construction (shorter wires, less difficult routings), but I'm not sure whether I really did a good job. There were about a dozen busses touching all but 10 of the devices. My respect for the folks who do board layout and floorplan design continues to grow. Anyway, here it is:
|